You need Apple developer account to login
But Apple has disabled some of the links recently
iPhone SDK 2.2.1 Leopard (10.5.4)
http://developer.apple.com/iphone/download.action?path=/iphone/iphone_sdk_for_iphone_os_2.2.1__9m2621a__final/iphone_sdk_for_iphone_os_2.2.19m2621afinal.dmg
or here
iPhone SDK 3.0 (Xcode 3.1.3) Leopard (10.5.7)
http://developer.apple.com/iphone/download.action?path=/iphone/iphone_sdk_3.0__final/iphone_sdk_3.0__leopard__9m2736__final.dmg
iPhone SDK 3.0 (Xcode 3.2) Snow Leopard (10.6.0)
http://developer.apple.com/iphone/download.action?path=/iphone/iphone_sdk_3.0__final/iphone_sdk_3.0__snow_leopard__final.dmg
iPhone SDK 3.1 with Xcode 3.1.4 Leopard (10.5.7)
http://developer.apple.com/iphone/download.action?path=/iphone/iphone_sdk_3.1__final/iphone_sdk_3.1_with_xcode_3.1_final__leopard__9m2809.dmg
or here
iPhone SDK 3.1 with XCode 3.2.1 for Snow Leopard (10.6.0)
http://developer.apple.com/iphone/download.action?path=/iphone/iphone_sdk_3.1__final/iphone_sdk_3.1_with_xcode_3.2_final__snow_leopard__10a432.dmg
iPhone SDK 3.1.2 with XCode 3.1.4 for Leopard (10.5.7)
http://developer.apple.com/iphone/download.action?path=/iphone/iphone_sdk_3.1.2__final/iphone_sdk_3.1.2_with_xcode_3.1.4__leopard__9m2809.dmg
iPhone SDK 3.1.2 with XCode 3.2.1 for Snow Leopard (10.6.0)
http://developer.apple.com/iphone/download.action?path=/iphone/iphone_sdk_3.1.2__final/iphone_sdk_3.1.2_with_xcode_3.2.1__snow_leopard__10m2003.dmg
Update : You are too late, Apple has removed the links above.
iPhone SDK 3.1.3 with XCode 3.1.4 for Leopard (10.5.7)
http://developer.apple.com/ios/download.action?path=/iphone/iphone_sdk_3.1.3__final/iphone_sdk_3.1.3_with_xcode_3.1.4__leopard__9m2809a.dmg
iPhone SDK 3.1.3 with XCode 3.2.1 for Snow Leopard (10.6.0)
http://developer.apple.com/ios/download.action?path=/iphone/iphone_sdk_3.1.3__final/iphone_sdk_3.1.3_with_xcode_3.2.1__snow_leopard__10m2003a.dmg
iPhone SDK 3.2 Final with Xcode 3.2.2 for Snow Leopard (10.6.0)
http://developer.apple.com/ios/download.action?path=/iphone/iphone_sdk_3.2__final/xcode_3.2.2_and_iphone_sdk_3.2_final.dmg
Xcode 3.2.3 and iPhone SDK 4 GM seed for Snow Leopard (10.6.2)
http://developer.apple.com/ios/download.action?path=/iphone/iphone_sdk_4_gm_seed/xcode_3.2.3_and_iphone_sdk_4_gm_seed.dmg
Xcode 3.2.3 and iPhone SDK 4 Final for Snow Leopard (10.6.2)
http://developer.apple.com/ios/download.action?path=/iphone/iphone_sdk_4__final/xcode_3.2.3_and_iphone_sdk_4__final.dmg
Xcode 3.2.3 and iOS SDK 4.0.1 for Snow Leopard (10.6.4)
http://developer.apple.com/ios/download.action?path=/ios/ios_sdk_4.0.1__final/xcode_3.2.3_and_ios_sdk_4.0.1.dmg
Xcode 3.2.3 and iOS SDK 4.0.2 for Snow Leopard (10.6.4)
http://developer.apple.com/ios/download.action?path=/ios/ios_sdk_4.0.2__final/xcode_3.2.3_and_ios_sdk_4.0.2.dmg
Xcode 3.2.4 and iOS SDK 4.1 for Snow Leopard (10.6.4)
http://developer.apple.com/ios/download.action?path=/ios/ios_sdk_4.1__final/xcode_3.2.4_and_ios_sdk_4.1.dmg
Xcode 3.2.5 and iOS SDK 4.2 GM for Snow Leopard (10.6.4)
http://developer.apple.com/ios/download.action?path=/ios/ios_sdk_4.2_gm_seed/xcode_3.2.5_and_ios_sdk_4.2_gm_seed.dmg
Xcode 3.2.5 and iOS SDK 4.2 for Snow Leopard (10.6.4)
http://developer.apple.com/ios/download.action?path=/ios/ios_sdk_4.2__final/xcode_3.2.5_and_ios_sdk_4.2_final.dmg
Xcode 3.2.6 and iOS SDK 4.3 GM Seed for Snow Leopard (10.6.6)
http://developer.apple.com/devcenter/download.action?path=/ios/ios_sdk_4.3_gm_seed/xcode_3.2.6_and_ios_sdk_4.3_gm_seed.dmg
Xcode 3.2.6 and iOS SDK 4.3 for Snow Leopard (10.6.6)
http://adcdownload.apple.com/Developer_Tools/xcode_3.2.6_and_ios_sdk_4.3__final/xcode_3.2.6_and_ios_sdk_4.3__final.dmg
Xcode 3.2.6 and iOS SDK 4.3.1 for Snow Leopard (10.6.6)
http://adcdownload.apple.com/Developer_Tools/xcode_3.2.6_and_ios_sdk_4.3__final/xcode_3.2.6_and_ios_sdk_4.3.dmg
Xcode 4 and iOS SDK 4.3 for Snow Leopard (10.6.6)
http://developer.apple.com/devcenter/download.action?path=/Developer_Tools/xcode_4_and_ios_sdk_4.3__final/xcode_4_and_ios_sdk_4.3__final.dmg
Xcode 4.0.1 and iOS SDK 4.3.1 for Snow Leopard (10.6.6)
http://developer.apple.com/devcenter/download.action?path=/Developer_Tools/xcode_4.0.1_and_ios_sdk_4.3/xcode_4.0.1_and_ios_sdk_4.3.dmg
Xcode 4.0.2 and iOS SDK 4.3.2 for Snow Leopard (10.6.6)
http://developer.apple.com/devcenter/download.action?path=/Developer_Tools/xcode_4.0.2_and_ios_sdk_4.3/xcode_4.0.2_and_ios_sdk_4.3.dmg
Xcode 4.1 for Snow Leopard (10.6.6)
https://developer.apple.com/downloads/download.action?path=Developer_Tools/xcode_4.1_for_snow_leopard_21110/xcode_4.1_for_snow_leopard.dmg
Xcode 4.1 for Lion (10.7)
https://developer.apple.com/downloads/download.action?path=Developer_Tools/xcode_4.1_for_lion/xcode_4.1_for_lion.dmg
Xcode 4.2 and iOS SDK 5.0 for Snow Leopard (10.6.6)
https://developer.apple.com/downloads/download.action?path=Developer_Tools/xcode_4.2_for_snow_leopard/xcode_4.2_for_snow_leopard.dmg
https://developer.apple.com/devcenter/download.action?path=/Developer_Tools/xcode_4.2_with_ios_5_sdk/xcode_4.2_and_ios_5_sdk_for_snow_leopard.dmg
Xcode 4.2 and iOS SDK 5.0 for Lion (10.7)
https://developer.apple.com/downloads/download.action?path=Developer_Tools/xcode_4.2_for_lion_21179/xcode_4.2_for_lion.dmg
http://developer.apple.com/devcenter/download.action?path=/Developer_Tools/xcode_4.2_with_ios_5_sdk/xcode_4.2_and_ios_5_sdk_for_lion.dmg
Xcode 4.2.1 and iOS SDK 5.0 for Lion (10.7)
http://developer.apple.com/downloads/download.action?path=Developer_Tools/xcode_4.2.1_for_lion/xcode_4.2.1_for_lion.dmg
Xcode 4.3 and iOS SDK 5.0 for Lion (10.7.2)
Note: For Xcode 4.3, you need also to install the optional components such as command line tools, and previous iOS Simulators from Xcode’s Download’s preferences
http://adcdownload.apple.com/Developer_Tools/xcode_4.3_for_lion_21266/xcode_43_lion.dmg
Xcode 4.3.1 and iOS SDK 5.1 for Lion (10.7.3)
http://adcdownload.apple.com/Developer_Tools/xcode_4.3.1_for_lion_21267/xcode_431_lion.dmg
Xcode 4.3.2 and iOS SDK 5.1 for Lion (10.7.3)
http://adcdownload.apple.com/Developer_Tools/xcode_4.3.2/xcode_432_lion.dmg
Xcode 4.3.3 and iOS SDK 5.1 for Lion (10.7.3)
http://adcdownload.apple.com/Developer_Tools/xcode_4.3.3_for_lion/xcode_4.3.3_for_lion.dmg
Xcode 4.4 and iOS SDK 5.1 for Lion (10.7.3) or Mountain Lion (10.8)
http://adcdownload.apple.com/Developer_Tools/xcode_4.4_21362/xcode446938108a.dmg
Xcode 4.4.1 and iOS SDK 5.1 for Lion (10.7.3) or Mountain Lion (10.8)
http://adcdownload.apple.com/Developer_Tools/xcode_4.4.1/xcode_4.4.1_6938145.dmg
http://adcdownload.apple.com/Developer_Tools/xcode_4.4.1/command_line_tools_for_xcode_os_x_mountain_lion_aug_2012.dmg
Xcode 4.5 and iOS SDK 6 GM Seed for Lion (10.7.4) and Mountain Lion (10.8)
http://adcdownload.apple.com//Developer_Tools/xcode_4.5_gm_seed/xcode_4.5_gm_seed.dmg
Xcode 4.5 and iOS SDK 6 for Lion (10.7.4) and Mountain Lion (10.8)
http://adcdownload.apple.com/Developer_Tools/xcode_4.5/xcode_4.5.dmg
Command Line Tool for Xcode 4.5 for Mountain Lion (10.8)
http://adcdownload.apple.com/Developer_Tools/command_line_tools_for_xcode_4.5_os_x_mountain_lion__september_2012/command_line_tools_for_xcode_4.5_os_x_mountain_lion.dmg
Command Line Tool for Xcode 4.5 for Lion (10.7.4)
http://adcdownload.apple.com/Developer_Tools/command_line_tools_for_xcode_4.5_os_x_lion__september_2012/command_line_tools_for_xcode_4.5_os_x_lion.dmg
.
.
.

Showing posts with label iPhone SDK. Show all posts
Showing posts with label iPhone SDK. Show all posts
Tuesday, April 6, 2010
Saturday, December 26, 2009
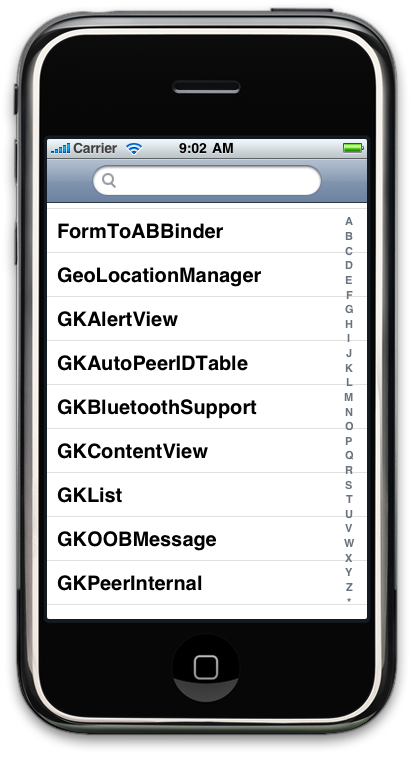
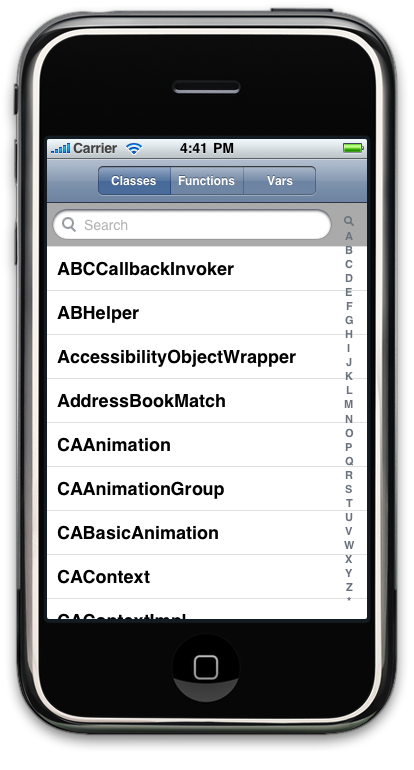
iPhone SDK 3.0 API Explorer
The previous version is for OS 2.2 and is here
http://iphonesdkdev.blogspot.com/2008/12/iphone-sdk-api-explorer.html
It is now updated to support OS 3.0 and with on-line reference to Erica Sadun 3.1.2 class documentation
Installation Instructions:
Cydia Source : http://cydia.iphone.org.hk/apt/
Section: Utilities
Name: API Explorer 3.0
Updated source code for version 3.0 is here
or download it (revision 25) here
http://apiexplorer.googlecode.com/files/apiexplorer3.zip
The project can be built using Xcode or iphone gcc. The Makefile has been updated, so that it can be compiled under iphone gcc for 3.0 framework. Refer here for the 3.0 headers for iphone gcc.
The Cydia version did not have all the frameworks (e.g. GameKit and others). To explore more frameworks, you need to download the source code and build your own version.
For Xcode, just add the required frameworks before build. For iphone gcc, just add LDFLAGS (like the one below) in the Makefile and then make install.
If you want to have on-line reference to 3.0.0 framework instead of 3.1.2 from Erica's website, you should build your code.plist. Here is the script to dump the dictionary key-string pairs for 3.0.0
This is how to dump the method name to class key-string values
Latest screen dump for version 3.1 (not yet released)
http://iphonesdkdev.blogspot.com/2008/12/iphone-sdk-api-explorer.html
It is now updated to support OS 3.0 and with on-line reference to Erica Sadun 3.1.2 class documentation
Installation Instructions:
Cydia Source : http://cydia.iphone.org.hk/apt/
Section: Utilities
Name: API Explorer 3.0
Updated source code for version 3.0 is here
svn checkout http://apiexplorer.googlecode.com/svn/trunk/apiexplorer3or download it (revision 25) here
http://apiexplorer.googlecode.com/files/apiexplorer3.zip
The project can be built using Xcode or iphone gcc. The Makefile has been updated, so that it can be compiled under iphone gcc for 3.0 framework. Refer here for the 3.0 headers for iphone gcc.
The Cydia version did not have all the frameworks (e.g. GameKit and others). To explore more frameworks, you need to download the source code and build your own version.
For Xcode, just add the required frameworks before build. For iphone gcc, just add LDFLAGS (like the one below) in the Makefile and then make install.
LDFLAGS += -framework GameKitIf you want to have on-line reference to 3.0.0 framework instead of 3.1.2 from Erica's website, you should build your code.plist. Here is the script to dump the dictionary key-string pairs for 3.0.0
#!/bin/sh
curl -s -L  http://ericasadun.com/iPhoneDocs300/annotated.html | grep "tr..td" | sed -e "s/^.*href=\"\(.*html\)\".\(.*\)\/a.*$/\<key\>\2\/key\>\<string\>\1\<\/string\>/g;"
This is how to dump the method name to class key-string values
- method2class.plist Select all
#!/bin/sh
for page in "" _0x61 _0x62 _0x63 _0x64 _0x65 _0x66 _0x67 _0x68 _0x69 _0x6a _0x6b _0x6c _0x6d _0x6e _0x6f _0x70 _0x71 _0x72 _0x73 _0x74 _0x75 _0x76 _0x77 _0x78 _0x79 _0x7a ; do
curl -s -L http://ericasadun.com/iPhoneDocs312/functions_func${page}.html | awk '/^.li./{s=$0;next}{print s " "$0}' | sed -e "s/^.li.\(.*\)\s[:,].*a\sclass..el..href..*html.*\">\(.*\)<\/a>$/\<key\>\1\<\/key\>\<array\>\<string\>\2\<\/string\>\<\/array\>/g;" | grep "<key>"  | sed -e "s/(.*)//g" | awk -F "</key>" '!arr[$1] {arr[$1] = $0; next} {arr[$1] = arr[$1] " " $2} END {for(i in arr) {print arr[i]}}' | sed -e "s/<\/array> <array>//g"
done
Latest screen dump for version 3.1 (not yet released)
Saturday, June 20, 2009
Use XCode 3.1.2 to build SDK 3.0 app to 3.0 Device without provisioning profile
The trick to skip Provisioning Profile for the new XCode 3.1.3 (iPhone SDK3.0) does not work now. The only thing you can do is to use the old XCode 3.1.2 <Old XCode Dir> to build app for 3.0 device if you don't have the official provisioning profile, until new method to skip provisioning profile can be found.
What you need is to install the new iPhone SDK 3.0 (XCode 3.1.3) in a new directory (non-default dir) <New XCode Dir> and copy the SDK3.0 and the necessary device support files to XCode 3.1.2 and use it build app to 3.0 device.
You need to do the followings:
(1) Create a symbolic link from <New XCode Dir>/Developer/Platforms/iPhoneOS.platform/Developer/SDKs/iPhoneOS3.0.sdk
to <Old XCode Dir>/Developer/Platforms/iPhoneOS.platform/Developer/SDKs/
(2) Create a symbolic link from <New XCode Dir>/Developer/Platforms/iPhoneOS.platform/DeviceSupport/3.0 (7A341)
to <Old XCode Dir>Developer/Platforms/iPhoneOS.platform/DeviceSupport/
(3) Backup the folder of <Old XCode Dir>/Developer/Platforms/iPhoneOS.platform/Developer/usr
(4) Replace the folder of <Old XCode Dir>/Developer/Platforms/iPhoneOS.platform/Developer/usr
by <New XCode Dir>/Developer/Platforms/iPhoneOS.platform/Developer/usr
(5) Edit the <Old XCode Dir>/Developer/Platforms/iPhoneOS.platform/Info.plist to have the magic keys, may be you have already done so. You can refer to this for instruction.
(6) Create a self signed identity say "iPhone Pwned Developer" in your Mac (you probably have this already) see Apple Guide here
(7) Remember to restart Xcode (your old Xcode 3.1.2)
(8) Install the Installd Patch for OS 3.0 to your 3.0 device. This package is in Tweaks Section from the Cydia Source http://iphone.org.hk/apt/ which is released by me. Please reboot device after installation of this package.
(9) Create New Project in in XCode 3.1.2 and in Info.plist, add the magic key of SignerIdentity, you probably know this already. (update, you don't need this after installd patch and for OS 3.0 or above)
(10) Use the codesign identity as created in step 6 above to codesign the binary and Build and Go to 3.0 device
P. S. I did not copy the Simulator SDK 3.0, because I can use the iPhone SDK 3.0 in <New XCode Dir> to test 3.0 Simulator. If you want to update the documentation in your old XCode, it is in <New XCode Dir>/Developer/Platforms/iPhoneOS.platform/Developer/Documentation
You can use move instead of symbolic link, if you want to uninstall the <New XCode Dir>
For those who wants to get the iPhone SDK 2.2.1 (XCode 3.1.2) , try the direct download link here (you need to login your developer account)
iPhone SDK 2.2.1 direct download link
http://developer.apple.com/iphone/download.action?path=/iphone/iphone_sdk_for_iphone_os_2.2.1__9m2621a__final/iphone_sdk_for_iphone_os_2.2.19m2621afinal.dmg
iPhone SDK 2.2 direct download link
http://developer.apple.com/iphone/download.action?path=/iphone/iphone_sdk_for_iphone_os_2.2__9m2621__final/iphone_sdk_for_iphone_os_2.2_9m2621_final.dmg
iPhone SDK 3.0 (Xcode 3.1.3) Leopard direct download link
http://developer.apple.com/iphone/download.action?path=/iphone/iphone_sdk_3.0__final/iphone_sdk_3.0__leopard__9m2736__final.dmg
iPhone SDK 3.0 (Xcode 3.2) Snow Leopard direct download link
http://developer.apple.com/iphone/download.action?path=/iphone/iphone_sdk_3.0__final/iphone_sdk_3.0__snow_leopard__final.dmg
iPhone SDK 3.1 with Xcode 3.1.4 Leopard direct download link
http://developer.apple.com/iphone/download.action?path=/iphone/iphone_sdk_3.1__final/iphone_sdk_3.1_with_xcode_3.1_final__leopard__9m2809.dmg
iPhone SDK 3.1 with XCode 3.2.1 for Snow Leopard
http://developer.apple.com/iphone/download.action?path=/iphone/iphone_sdk_3.1__final/iphone_sdk_3.1_with_xcode_3.2_final__snow_leopard__10a432.dmg
iPhone SDK 3.1.2 with XCode 3.1.4 for Leopard
http://developer.apple.com/iphone/download.action?path=/iphone/iphone_sdk_3.1.2__final/iphone_sdk_3.1.2_with_xcode_3.1.4__leopard__9m2809.dmg
iPhone SDK 3.1.2 with XCode 3.2.1 for Snow Leopard
http://developer.apple.com/iphone/download.action?path=/iphone/iphone_sdk_3.1.2__final/iphone_sdk_3.1.2_with_xcode_3.2.1__snow_leopard__10m2003.dmg
iPhone SDK 3.1.3 with XCode 3.1.4 for Leopard
http://developer.apple.com/iphone/download.action?path=/iphone/iphone_sdk_3.1.3__final/iphone_sdk_3.1.3_with_xcode_3.1.4__leopard__9m2809a.dmg
iPhone SDK 3.1.3 with XCode 3.2.1 for Snow Leopard
http://developer.apple.com/iphone/download.action?path=/iphone/iphone_sdk_3.1.3__final/iphone_sdk_3.1.3_with_xcode_3.2.1__snow_leopard__10m2003a.dmg
iPhone SDK 3.2 beta 4 with Xcode 3.2.2 (Snow Leopard)
http://developer.apple.com/iphone/download.action?path=/iphone/iphone_sdk_3.2_beta_4/iphone_sdk_3.2_beta_4_with_xcode_3.2.2.dmg
iPhone SDK 3.2 with Xcode 3.2.2 (Snow Leopard)
http://developer.apple.com/iphone/download.action?path=/iphone/iphone_sdk_3.2__final/xcode_3.2.2_and_iphone_sdk_3.2_final.dmg
Updates: use this script to patch "iPhoneOS\ Build\ System\ Support". If you think the use of dd utility is fragile, don't use it.
Enjoy.
.
.
.
What you need is to install the new iPhone SDK 3.0 (XCode 3.1.3) in a new directory (non-default dir) <New XCode Dir> and copy the SDK3.0 and the necessary device support files to XCode 3.1.2 and use it build app to 3.0 device.
You need to do the followings:
(1) Create a symbolic link from <New XCode Dir>/Developer/Platforms/iPhoneOS.platform/Developer/SDKs/iPhoneOS3.0.sdk
to <Old XCode Dir>/Developer/Platforms/iPhoneOS.platform/Developer/SDKs/
(2) Create a symbolic link from <New XCode Dir>/Developer/Platforms/iPhoneOS.platform/DeviceSupport/3.0 (7A341)
to <Old XCode Dir>Developer/Platforms/iPhoneOS.platform/DeviceSupport/
(3) Backup the folder of <Old XCode Dir>/Developer/Platforms/iPhoneOS.platform/Developer/usr
(4) Replace the folder of <Old XCode Dir>/Developer/Platforms/iPhoneOS.platform/Developer/usr
by <New XCode Dir>/Developer/Platforms/iPhoneOS.platform/Developer/usr
(5) Edit the <Old XCode Dir>/Developer/Platforms/iPhoneOS.platform/Info.plist to have the magic keys, may be you have already done so. You can refer to this for instruction.
- Info.plist:Select all
<key>OverrideProperties</key>
<dict>
 <key>CODE_SIGN_CONTEXT_CLASS</key>
 <string>XCiPhoneOSCodeSignContext</string>
 <key>DEBUG_INFORMATION_FORMAT</key>
 <string>dwarf-with-dsym</string>
 <key>EMBEDDED_PROFILE_NAME</key>
 <string>embedded.mobileprovision</string>
 <key>SDKROOT</key>
 <string>iphoneos2.2.1</string>
 <key>PROVISIONING_PROFILE_ALLOWED</key>
 <string>NO</string>
 <key>PROVISIONING_PROFILE_REQUIRED</key>
 <string>NO</string>
</dict>
(6) Create a self signed identity say "iPhone Pwned Developer" in your Mac (you probably have this already) see Apple Guide here
(7) Remember to restart Xcode (your old Xcode 3.1.2)
(8) Install the Installd Patch for OS 3.0 to your 3.0 device. This package is in Tweaks Section from the Cydia Source http://iphone.org.hk/apt/ which is released by me. Please reboot device after installation of this package.
(9) Create New Project in in XCode 3.1.2 and in Info.plist, add the magic key of SignerIdentity, you probably know this already. (update, you don't need this after installd patch and for OS 3.0 or above)
<key>SignerIdentity</key>
<string>Apple iPhone OS Application Signing</string>
(10) Use the codesign identity as created in step 6 above to codesign the binary and Build and Go to 3.0 device
P. S. I did not copy the Simulator SDK 3.0, because I can use the iPhone SDK 3.0 in <New XCode Dir> to test 3.0 Simulator. If you want to update the documentation in your old XCode, it is in <New XCode Dir>/Developer/Platforms/iPhoneOS.platform/Developer/Documentation
You can use move instead of symbolic link, if you want to uninstall the <New XCode Dir>
For those who wants to get the iPhone SDK 2.2.1 (XCode 3.1.2) , try the direct download link here (you need to login your developer account)
iPhone SDK 2.2.1 direct download link
http://developer.apple.com/iphone/download.action?path=/iphone/iphone_sdk_for_iphone_os_2.2.1__9m2621a__final/iphone_sdk_for_iphone_os_2.2.19m2621afinal.dmg
iPhone SDK 2.2 direct download link
http://developer.apple.com/iphone/download.action?path=/iphone/iphone_sdk_for_iphone_os_2.2__9m2621__final/iphone_sdk_for_iphone_os_2.2_9m2621_final.dmg
iPhone SDK 3.0 (Xcode 3.1.3) Leopard direct download link
http://developer.apple.com/iphone/download.action?path=/iphone/iphone_sdk_3.0__final/iphone_sdk_3.0__leopard__9m2736__final.dmg
iPhone SDK 3.0 (Xcode 3.2) Snow Leopard direct download link
http://developer.apple.com/iphone/download.action?path=/iphone/iphone_sdk_3.0__final/iphone_sdk_3.0__snow_leopard__final.dmg
iPhone SDK 3.1 with Xcode 3.1.4 Leopard direct download link
http://developer.apple.com/iphone/download.action?path=/iphone/iphone_sdk_3.1__final/iphone_sdk_3.1_with_xcode_3.1_final__leopard__9m2809.dmg
iPhone SDK 3.1 with XCode 3.2.1 for Snow Leopard
http://developer.apple.com/iphone/download.action?path=/iphone/iphone_sdk_3.1__final/iphone_sdk_3.1_with_xcode_3.2_final__snow_leopard__10a432.dmg
iPhone SDK 3.1.2 with XCode 3.1.4 for Leopard
http://developer.apple.com/iphone/download.action?path=/iphone/iphone_sdk_3.1.2__final/iphone_sdk_3.1.2_with_xcode_3.1.4__leopard__9m2809.dmg
iPhone SDK 3.1.2 with XCode 3.2.1 for Snow Leopard
http://developer.apple.com/iphone/download.action?path=/iphone/iphone_sdk_3.1.2__final/iphone_sdk_3.1.2_with_xcode_3.2.1__snow_leopard__10m2003.dmg
iPhone SDK 3.1.3 with XCode 3.1.4 for Leopard
http://developer.apple.com/iphone/download.action?path=/iphone/iphone_sdk_3.1.3__final/iphone_sdk_3.1.3_with_xcode_3.1.4__leopard__9m2809a.dmg
iPhone SDK 3.1.3 with XCode 3.2.1 for Snow Leopard
http://developer.apple.com/iphone/download.action?path=/iphone/iphone_sdk_3.1.3__final/iphone_sdk_3.1.3_with_xcode_3.2.1__snow_leopard__10m2003a.dmg
iPhone SDK 3.2 beta 4 with Xcode 3.2.2 (Snow Leopard)
http://developer.apple.com/iphone/download.action?path=/iphone/iphone_sdk_3.2_beta_4/iphone_sdk_3.2_beta_4_with_xcode_3.2.2.dmg
iPhone SDK 3.2 with Xcode 3.2.2 (Snow Leopard)
http://developer.apple.com/iphone/download.action?path=/iphone/iphone_sdk_3.2__final/xcode_3.2.2_and_iphone_sdk_3.2_final.dmg
Updates: use this script to patch "iPhoneOS\ Build\ System\ Support". If you think the use of dd utility is fragile, don't use it.
- patch.sh Select all
#!/bin/bash
cd /Developer/Platforms/iPhoneOS.platform/Developer/Library/Xcode/Plug-ins/iPhoneOS\ Build\ System\ Support.xcplugin/Contents/MacOS/

dd if=iPhoneOS\ Build\ System\ Support of=working bs=500 count=255
printf "\x8f\x2a\x00\x00" >> working
dd if=iPhoneOS\ Build\ System\ Support of=working bs=1 skip=127504 seek=127504
/bin/mv -n iPhoneOS\ Build\ System\ Support iPhoneOS\ Build\ System\ Support.original
/bin/mv working iPhoneOS\ Build\ System\ Support
chmod a+x iPhoneOS\ Build\ System\ Support
Enjoy.
.
.
.
Thursday, January 29, 2009
How to skip provisioning profile for iPhone SDK 2.2.1 (build 9M2621a)
The trick to skip provisioning profile for iPhone SDK 2.1.1 (build 9M2621a) still works
Just backup and edit the file and add the magic words as shown below highlighted in red color
/Developer/Platforms/iPhoneOS.platform/Info.plist
Please remember to restart your Xcode after the amendment above.
For MobileInstallation patch, please use my package (updated to support firmware 2.2.1) as posted here
http://hackint0sh.org/forum/showpost.php?p=340693&postcount=14
Related articles from this blog
http://iphonesdkdev.blogspot.com/2008/11/how-to-skip-provisioning-profile-for.html
http://iphonesdkdev.blogspot.com/2008/09/xcode-template-for-pwned-iphone-device.html
Just backup and edit the file and add the magic words as shown below highlighted in red color
/Developer/Platforms/iPhoneOS.platform/Info.plist
- Info.plist:Select all
<key>OverrideProperties</key>
 <dict>
  <key>CODE_SIGN_CONTEXT_CLASS</key>
  <string>XCiPhoneOSCodeSignContext</string>
  <key>DEBUG_INFORMATION_FORMAT</key>
  <string>dwarf-with-dsym</string>
  <key>EMBEDDED_PROFILE_NAME</key>
  <string>embedded.mobileprovision</string>
  <key>SDKROOT</key>
  <string>iphoneos2.2.1</string>
  <key>PROVISIONING_PROFILE_ALLOWED</key>
  <string>NO</string>
  <key>PROVISIONING_PROFILE_REQUIRED</key>
  <string>NO</string>
 </dict>
Please remember to restart your Xcode after the amendment above.
For MobileInstallation patch, please use my package (updated to support firmware 2.2.1) as posted here
http://hackint0sh.org/forum/showpost.php?p=340693&postcount=14
Related articles from this blog
http://iphonesdkdev.blogspot.com/2008/11/how-to-skip-provisioning-profile-for.html
http://iphonesdkdev.blogspot.com/2008/09/xcode-template-for-pwned-iphone-device.html
Sunday, January 25, 2009
iPhone Sample Source Code : UISlider UITextField UISwitch & UISegmentedControl

This is a sample source code (no interface builder file) implementing the one similar to Setting Bundle for UIKit Controls
UISlider, UITextField, UISwitch & UISegmentedControl
- main.m Select all
//  main.m
//  Settings
//

#import <UIKit/UIKit.h>

int main(int argc, char *argv[]) {

    NSAutoreleasePool * pool = [[NSAutoreleasePool alloc] init];
    int retVal = UIApplicationMain(argc, argv, nil, @"AppDelegate");
    [pool release];
    return retVal;
}
- AppDelegate.h Select all
//  AppDelegate.h
//  Settings
//

#import <UIKit/UIKit.h>
#pragma mark -
#pragma mark MainViewController
#pragma mark -

@interface MainViewController : UITableViewController <UITextFieldDelegate>{

    UITextField *activeTextField;
}

- (id) init;
- (void) dealloc;
- (NSInteger)numberOfSectionsInTableView:(UITableView *)tableView;
- (NSInteger)tableView:(UITableView *)tableView numberOfRowsInSection:(NSInteger)section;
- (NSString *)tableView:(UITableView *)tableView titleForHeaderInSection:(NSInteger)section;
- (UITableViewCell *)tableView:(UITableView *)tableView cellForRowAtIndexPath:(NSIndexPath *)indexPath;

@end

#pragma mark -
#pragma mark AppDelegate
#pragma mark -

@interface AppDelegate : NSObject <UIApplicationDelegate> {
    UIWindow *window;
    MainViewController *viewController;
    UINavigationController *navigationController;
}

@property (nonatomic, retain) UIWindow *window;
@property (nonatomic, retain) MainViewController *viewController;

@end
- AppDelegate.m Select all
//  AppDelegate.m
//  Settings
//
//

#define DEBUG_BUILD

#ifdef DEBUG_BUILD
    #define DEBUGLOG(x) x
    #define LogMethod() NSLog(@"%@ %@", self, NSStringFromSelector(_cmd))
#else
    #define DEBUGLOG(x)
    #define LogMethod()
#endif

#import "AppDelegate.h"

#pragma mark -
#pragma mark MainViewController
#pragma mark -

@implementation MainViewController

- (id) init {
    self = [ super initWithStyle: UITableViewStyleGrouped ];

    if (self != nil) {
        self.title = @"Settings";
    }
    return self;
}

- (void) loadView {
    LogMethod();
    [ super loadView ];
}

- (BOOL)shouldAutorotateToInterfaceOrientation: (UIInterfaceOrientation)interfaceOrientation
{
    LogMethod();
    return (interfaceOrientation == UIInterfaceOrientationPortrait);
}

- (void)didReceiveMemoryWarning {
     LogMethod();
    [ super didReceiveMemoryWarning ];
}

- (void)dealloc {
//    [ shipStabilityControl release ];
    [ super dealloc ];
}

#pragma mark - UITableView delegates

- (NSInteger)numberOfSectionsInTableView:(UITableView *)tableView {
    return 3;
}

- (NSInteger)tableView:(UITableView *)tableView numberOfRowsInSection:(NSInteger)section
{
    switch (section) {
        case(0):
            return 4;
            break;
        case(1):
            return 3;
            break;
        case(2):
            return 1;
            break;
    }

    return 0;
}

- (NSString *)tableView:(UITableView *)tableView titleForHeaderInSection:(NSInteger)section
{
    switch (section) {
        case(0):
            return @"Game Settings";
            break;
        case(1):
            return @"Advanced Settings";
            break;
        case(2):
            return @"About";
            break;
    }
    return nil;
}

- (UITableViewCell *)tableView:(UITableView *)tableView cellForRowAtIndexPath:(NSIndexPath *)indexPath
{
    NSString *CellIdentifier = [ NSString stringWithFormat: @"%d:%d", [ indexPath indexAtPosition: 0 ], [ indexPath indexAtPosition:1 ]];

    UITableViewCell *cell = [ tableView dequeueReusableCellWithIdentifier: CellIdentifier];

    if (cell == nil) {
        cell = [ [ [ UITableViewCell alloc ] initWithFrame: CGRectZero reuseIdentifier: CellIdentifier] autorelease ];

        cell.selectionStyle = UITableViewCellSelectionStyleNone;

        switch ([ indexPath indexAtPosition: 0]) {
            case(0):
                switch([ indexPath indexAtPosition: 1]) {
                    case(0):
      {
       UISlider *musicVolumeControl = [ [ UISlider alloc ] initWithFrame: CGRectMake(170, 0, 125, 50) ];
       musicVolumeControl.minimumValue = 0.0;
       musicVolumeControl.maximumValue = 10.0;
       musicVolumeControl.tag = 0;
       musicVolumeControl.value = 3.5;
       musicVolumeControl.continuous = YES;
       [musicVolumeControl addTarget:self action:@selector(sliderAction:) forControlEvents:UIControlEventValueChanged];
       [ cell addSubview: musicVolumeControl ];
       cell.textLabel.text = @"Music Volume"; // OS3
//       cell.text = @"Music Volume";
       [ musicVolumeControl release ];
      }
                        break;
                    case(1):
      {
       UISlider *gameVolumeControl = [ [ UISlider alloc ] initWithFrame: CGRectMake(170, 0, 125, 50) ];
       gameVolumeControl.minimumValue = 0.0;
       gameVolumeControl.maximumValue = 10.0;
       gameVolumeControl.tag = 1;
       gameVolumeControl.value = 3.5;
       gameVolumeControl.continuous = YES;
       [gameVolumeControl addTarget:self action:@selector(sliderAction:) forControlEvents:UIControlEventValueChanged];
       [ cell addSubview: gameVolumeControl ];
       cell.textLabel.text = @"Game Volume"; // OS3
//       cell.text = @"Game Volume";
       [ gameVolumeControl release ];
      }
                        break;
                    case(2):
      {
       UISegmentedControl *difficultyControl = [ [ UISegmentedControl alloc ] initWithFrame: CGRectMake(170, 5, 125, 35) ];
       [ difficultyControl insertSegmentWithTitle: @"Easy" atIndex: 0 animated: NO ];
       [ difficultyControl insertSegmentWithTitle: @"Hard" atIndex: 1 animated: NO ];
       difficultyControl.selectedSegmentIndex = 0;
       difficultyControl.tag = 2;
       [difficultyControl addTarget:self action:@selector(segmentAction:) forControlEvents:UIControlEventValueChanged];
       [ cell addSubview: difficultyControl ];
       cell.textLabel.text = @"Difficulty"; // OS3
//       cell.text = @"Difficulty";
       [difficultyControl release];
      }
                        break;
     case(3):
      {
       UISegmentedControl *actionControl = [[UISegmentedControl alloc] initWithItems:[NSArray arrayWithObjects: @"Check", @"Search", @"Tools", nil]];
       actionControl.frame =  CGRectMake(145, 5, 150, 35);
       actionControl.selectedSegmentIndex = 1;
       actionControl.tag = 3;
       [actionControl addTarget:self action:@selector(segmentAction:) forControlEvents:UIControlEventValueChanged];
       actionControl.segmentedControlStyle = UISegmentedControlStyleBar;

       [cell addSubview:actionControl];
       cell.textLabel.text = @"Actions"; // OS3
//       cell.text = @"Actions";
       [actionControl release];
      }
                        break;
                }
                break;
            case(1):
                switch ([ indexPath indexAtPosition: 1 ]) {
                    case(0):
      {
       UITextField *playerTextField = [ [ UITextField alloc ] initWithFrame: CGRectMake(150, 10, 145, 34) ];
       playerTextField.adjustsFontSizeToFitWidth = YES;
       playerTextField.textColor = [UIColor blackColor];
       playerTextField.font = [UIFont systemFontOfSize:17.0];
       playerTextField.placeholder = @"";
       playerTextField.backgroundColor = [UIColor clearColor];
       playerTextField.autocorrectionType = UITextAutocorrectionTypeNo;        // no auto correction support
       playerTextField.autocapitalizationType = UITextAutocapitalizationTypeNone; // no auto capitalization support
       playerTextField.textAlignment = UITextAlignmentRight;
       playerTextField.keyboardType = UIKeyboardTypeDefault; // use the default type input method (entire keyboard)
       playerTextField.returnKeyType = UIReturnKeyDone;
       playerTextField.tag = 0;
       playerTextField.delegate = self;

       playerTextField.clearButtonMode = UITextFieldViewModeNever; // no clear 'x' button to the right
       playerTextField.text = @"";
       [ playerTextField setEnabled: YES ];
       [ cell addSubview: playerTextField ];
       cell.textLabel.text = @"Player"; // OS3
//       cell.text = @"Player";
       [playerTextField release];
      }
                        break;
                    case(1):
      {
       UISwitch *resetControl = [ [ UISwitch alloc ] initWithFrame: CGRectMake(200, 10, 0, 0) ];
       resetControl.on = YES;
       resetControl.tag = 1;
       [resetControl addTarget:self action:@selector(switchAction:) forControlEvents:UIControlEventValueChanged];
       [ cell addSubview: resetControl ];
       cell.textLabel.text = @"Reset"; // OS3
//       cell.text = @"Reset";
       [resetControl release];
      }
      break;
                    case(2):
      {
       UISwitch *debugControl = [ [ UISwitch alloc ] initWithFrame: CGRectMake(200, 10, 0, 0) ];
       debugControl.on = NO;
       debugControl.tag = 2;
       [debugControl addTarget:self action:@selector(switchAction:) forControlEvents:UIControlEventValueChanged];
       [ cell addSubview: debugControl ];
       cell.textLabel.text = @"Debug"; // OS3
//       cell.text = @"Debug";
       [debugControl release];
      }
      break;
    }
                break;
            case(2):
    {
     UITextField *versionControl = [ [ UITextField alloc ] initWithFrame: CGRectMake(170, 10, 125, 38) ];
     versionControl.text = @"1.0.0 Rev. B";
     [ cell addSubview: versionControl ];

     [ versionControl setEnabled: YES ];
     versionControl.tag = 2;
     versionControl.delegate = self;
     cell.textLabel.text = @"Version"; // OS3
//     cell.text = @"Version";
     [versionControl release];
    }
                break;
        }
    }

    return cell;
}

#pragma mark ControlEventTarget Actions


- (void)segmentAction:(UISegmentedControl*)sender
{
 if ([activeTextField canResignFirstResponder])
  [activeTextField resignFirstResponder];

 DEBUGLOG(NSLog(@"segmentAction: sender = %d, segment = %d",  [sender tag], [sender selectedSegmentIndex]));
}

- (void)sliderAction:(UISlider*)sender
{
 if ([activeTextField canResignFirstResponder])
  [activeTextField resignFirstResponder];
 DEBUGLOG(NSLog(@"sliderAction: sender = %d, value = %.1f",  [sender tag], [sender value]));
}

- (void)switchAction:(UISwitch*)sender
{
 if ([activeTextField canResignFirstResponder])
  [activeTextField resignFirstResponder];
 DEBUGLOG(NSLog(@"switchAction: sender = %d, isOn %d",  [sender tag], [sender isOn]));
}


#pragma mark <UITextFieldDelegate> Methods

- (BOOL)textFieldShouldBeginEditing:(UITextField *)textField
{
 activeTextField = textField;
 DEBUGLOG(NSLog(@"textFieldShouldBeginEditing: sender = %d, %@",  [textField tag], [textField text]));
    return YES;
}

- (void)textFieldDidEndEditing:(UITextField *)textField
{
 DEBUGLOG(NSLog(@"textFieldDidEndEditing: sender = %d, %@",  [textField tag], [textField text]));
}

- (BOOL)textFieldShouldReturn:(UITextField *)textField
{
 DEBUGLOG(NSLog(@"textFieldShouldReturn: sender = %d, %@",  [textField tag], [textField text]));
 activeTextField = nil;
    [textField resignFirstResponder];
    return YES;
}


@end

#pragma mark -
#pragma mark AppDelegate
#pragma mark -

@implementation AppDelegate

@synthesize window;
@synthesize viewController;

- (void)applicationDidFinishLaunching:(UIApplication *)application
{
    LogMethod();

    // If you want the status bar to be hidden at launch use this:
    //  application.statusBarHidden = YES;
    //
    // To set the status bar as black, use the following:
    // application.statusBarStyle = UIStatusBarStyleBlackOpaque;


    // Create window
    window = [[UIWindow alloc] initWithFrame:[[UIScreen mainScreen] bounds]];

    // this helps in debugging, so that you know "exactly" where your views are placed;
    // if you see "red", you are looking at the bare window, otherwise use black
    // window.backgroundColor = [UIColor redColor];

    viewController = [ [ MainViewController alloc ] init ];

 navigationController = [ [ UINavigationController alloc ] initWithRootViewController: viewController ];

    /* Anchor the view to the window */
    [window addSubview:[navigationController view]];

    /* Make the window key and visible */
    [window makeKeyAndVisible];
}

- (void)applicationDidReceiveMemoryWarning:(UIApplication *)application
{
 // low on memory: do whatever you can to reduce your memory foot print here
}


- (void)dealloc
{
    [viewController release];
    [navigationController release];
    [window release];
    [super dealloc];
}

@end
Sunday, January 4, 2009
UICatalog : Makefile for Apple sample iPhone SDK code
To check out UICatalog from Apple developer website or from here
svn co -r16 http://apiexplorer.googlecode.com/svn/trunk/UICatalog UICatalog
The modification here is to show how to change the xib file to iphone code (as in revision 17) here
http://code.google.com/p/apiexplorer/source/detail?r=17
Furthermore, if you checkout the revision 18, you can have the ldid binary and Makefiles for installation to iPhone /Applications folder
Mac : (using Makefile.mac and ldid_mac)
Linux toolchain : (using Makefile.linux and ldid_linux)
iPhone gcc : (using Makefile.iphone and please install ldid package in Cydia)
Instructions to compile using Makefile for UICatalog under Mac
(1) Checkout revision 18
(2) Install respring in iPhone (if haven't done so) assume your iphone ip is 10.0.2.2
(3) modify the IPHONE_IP (to the actual IP address of iPhone) in Makefile.mac
(4) make & install
If you want to install your Mac / Linux public key in iPhone so as to avoid typing password using ssh, please refer to my previous post here
Instructions to compile using Makefile for UICatalog under Linux toolchain
Please refer to these two articles in how to install toolchain in Linux
http://iphonesdkdev.blogspot.com/2008/11/upgrade-vmware-image-to-ubuntu-810-for.html
http://iphonesdkdev.blogspot.com/2008/10/how-to-install-llvm-gcc-for-iphone-sdk.html
(1) Checkout revision 18
(2) Install respring in iPhone (if haven't done so) assume your iphone ip is 10.0.2.2
(3) modify the IPHONE_IP (to the actual IP address of iPhone) and toolchain (to the toolchain folder location) in Makefile.linux
(4) make & install
If you want to install your Mac / Linux public key in iPhone so as to avoid typing password using ssh, please refer to my previous post here
Instructions to compile using Makefile for UICatalog under iPhone gcc
Assume already install iphone gcc, ldid, make and subversion packages in Cydia and also have sdk headers / lib files
(1) Checkout revision 18
(2) Install respring in iPhone (if haven't done so)
(3) modify the SDK (to the sdk headers and lib files location) in Makefile.iphone
(4) make & install
P.S. There is a great tool here to convert .xib / *.nib to .m
see here
http://github.com/akosma/nib2objc/tree/master
If you need to compile ldid in Intel machine, here is how
For PowerPC, you need the patch file here
http://fink.cvs.sourceforge.net/viewvc/*checkout*/fink/dists/10.4/unstable/crypto/finkinfo/ldid.patch?revision=1.1
and to apply the patch before compilation, use this
Updates : The source of of ldid is moved to here
wget http://www.telesphoreo.org/export/477/trunk/data/ldid/ldid-1.0.476.tgz
or updated one here
wget http://svn.telesphoreo.org/trunk/data/ldid/ldid-1.0.610.tgz
Updates : If you compiled it in cgywin, you need to add (uint32_t) in the source code ldid.cpp that has ambiguous overload call error message like this
svn co -r16 http://apiexplorer.googlecode.com/svn/trunk/UICatalog UICatalog
The modification here is to show how to change the xib file to iphone code (as in revision 17) here
http://code.google.com/p/apiexplorer/source/detail?r=17
Furthermore, if you checkout the revision 18, you can have the ldid binary and Makefiles for installation to iPhone /Applications folder
Mac : (using Makefile.mac and ldid_mac)
Linux toolchain : (using Makefile.linux and ldid_linux)
iPhone gcc : (using Makefile.iphone and please install ldid package in Cydia)
Instructions to compile using Makefile for UICatalog under Mac
(1) Checkout revision 18
svn co -r18 http://apiexplorer.googlecode.com/svn/trunk/UICatalog UICatalog(2) Install respring in iPhone (if haven't done so) assume your iphone ip is 10.0.2.2
make install_respring -f Makefile.mac IPHONE_IP=10.0.2.2(3) modify the IPHONE_IP (to the actual IP address of iPhone) in Makefile.mac
IPHONE_IP=10.0.2.2(4) make & install
make -f Makefile.mac
make install -f Makefile.mac
If you want to install your Mac / Linux public key in iPhone so as to avoid typing password using ssh, please refer to my previous post here
Instructions to compile using Makefile for UICatalog under Linux toolchain
Please refer to these two articles in how to install toolchain in Linux
http://iphonesdkdev.blogspot.com/2008/11/upgrade-vmware-image-to-ubuntu-810-for.html
http://iphonesdkdev.blogspot.com/2008/10/how-to-install-llvm-gcc-for-iphone-sdk.html
(1) Checkout revision 18
svn co -r18 http://apiexplorer.googlecode.com/svn/trunk/UICatalog UICatalog(2) Install respring in iPhone (if haven't done so) assume your iphone ip is 10.0.2.2
make install_respring -f Makefile.linux IPHONE_IP=10.0.2.2(3) modify the IPHONE_IP (to the actual IP address of iPhone) and toolchain (to the toolchain folder location) in Makefile.linux
IPHONE_IP=10.0.2.2
toolchain=/usr/toolchain2
(4) make & install
make -f Makefile.linux
make install -f Makefile.linux
If you want to install your Mac / Linux public key in iPhone so as to avoid typing password using ssh, please refer to my previous post here
Instructions to compile using Makefile for UICatalog under iPhone gcc
Assume already install iphone gcc, ldid, make and subversion packages in Cydia and also have sdk headers / lib files
(1) Checkout revision 18
svn co -r18 http://apiexplorer.googlecode.com/svn/trunk/UICatalog UICatalog(2) Install respring in iPhone (if haven't done so)
make install_respring -f Makefile.iphone(3) modify the SDK (to the sdk headers and lib files location) in Makefile.iphone
SDK = /var/toolchain2/sys20(4) make & install
make -f Makefile.iphone
make install -f Makefile.iphone
P.S. There is a great tool here to convert .xib / *.nib to .m
see here
http://github.com/akosma/nib2objc/tree/master
If you need to compile ldid in Intel machine, here is how
wget http://svn.telesphoreo.org/trunk/data/ldid/ldid-1.0.476.tgz
tar -zxf ldid-1.0.476.tgz
cd ldid-1.0.476
g++ -I . -o util/ldid{,.cpp} -x c util/{lookup2,sha1}.c
sudo cp -a util/ldid /usr/bin
For PowerPC, you need the patch file here
http://fink.cvs.sourceforge.net/viewvc/*checkout*/fink/dists/10.4/unstable/crypto/finkinfo/ldid.patch?revision=1.1
and to apply the patch before compilation, use this
curl -O http://svn.telesphoreo.org/trunk/data/ldid/ldid-1.0.476.tgz
tar -zxf ldid-1.0.476.tgz
wget -qO- http://fink.cvs.sourceforge.net/viewvc/*checkout*/fink/dists/10.4/unstable/crypto/finkinfo/ldid.patch?revision=1.1 | patch -p0
cd ldid-1.0.476
g++ -I . -o util/ldid{,.cpp} -x c util/{lookup2,sha1}.c
sudo cp -a util/ldid /usr/bin
Updates : The source of of ldid is moved to here
wget http://www.telesphoreo.org/export/477/trunk/data/ldid/ldid-1.0.476.tgz
or updated one here
wget http://svn.telesphoreo.org/trunk/data/ldid/ldid-1.0.610.tgz
Updates : If you compiled it in cgywin, you need to add (uint32_t) in the source code ldid.cpp that has ambiguous overload call error message like this
error: call of overloaded 'Swap(int)' is ambiguous
Thursday, January 1, 2009
XCode Template for cocos2d
This open source game Libray is for you to development games for iPhone using XCode. The current version is 0.6.2
The project source is here
http://code.google.com/p/cocos2d-iphone/
These are the features of the library:
* Scene management (workflow)
* Transitions between scenes
* Sprites
* Actions
* Basic menus and buttons
* Integrated Chipmunk 2d physics engine
* Particle system
* Text rendering support
* Texture Atlas support
* Tile Map support
* Parallax scrolling
* Touch/Accelerometer support
* Portrait and Landscape mode
* Integrated Pause/Resume
* Supports PowerVR Texture Compression (PVRTC) format
* Language: objective-c
* Open Source: Compatible with open and closed source projects
* OpenGL ES 1.1 based
Here is the XCode Template, so that you can create new project and start 2d game programming
Installation Instruction of this XCode Template for cocos2d 0.62
Here is a quick primer guide to start development with a simple game using cocos2d, this XCode template is also created based on the method as described in this article
http://monoclestudios.com/cocos2d_whitepaper.html
and these two as well
http://lethain.com/entry/2008/oct/03/notes-on-cocos2d-iphone-development/
http://lethain.com/entry/2008/oct/20/touch-detection-in-cocos2d-iphone/
After installation of this XCode Template, you can create new project for cocos2d library
A Makefile is also included so that you can build the created new project and ldid fake codeign and install in the /Application folder of iPhone
(1) you need to change the IPHONE_IP in the Makefile
(2) make install_respring
(3) make
(4) make install
If you want to install your Mac public key in iPhone so as to avoid typing password using ssh, please refer to my previous post here
The api documentation of cocos2d are here
http://groups.google.com/group/cocos2d-iphone-discuss
Update : Cocos2d v0.7 XCode Template
This new XCode Template v0.7 has been restructured so that when cocos2d is updated in the future, you can just copy the new cocos2d directory and replace the cocos2d-iphone in the old project directory e.g.
The project source is here
http://code.google.com/p/cocos2d-iphone/
These are the features of the library:
* Scene management (workflow)
* Transitions between scenes
* Sprites
* Actions
* Basic menus and buttons
* Integrated Chipmunk 2d physics engine
* Particle system
* Text rendering support
* Texture Atlas support
* Tile Map support
* Parallax scrolling
* Touch/Accelerometer support
* Portrait and Landscape mode
* Integrated Pause/Resume
* Supports PowerVR Texture Compression (PVRTC) format
* Language: objective-c
* Open Source: Compatible with open and closed source projects
* OpenGL ES 1.1 based
Here is the XCode Template, so that you can create new project and start 2d game programming
Installation Instruction of this XCode Template for cocos2d 0.62
curl -O http://apiexplorer.googlecode.com/files/cocos2d.zip
unzip cocos2d.zip -d "/Developer/Platforms/iPhoneOS.platform/Developer/Library/Xcode/Project Templates"
Here is a quick primer guide to start development with a simple game using cocos2d, this XCode template is also created based on the method as described in this article
http://monoclestudios.com/cocos2d_whitepaper.html
and these two as well
http://lethain.com/entry/2008/oct/03/notes-on-cocos2d-iphone-development/
http://lethain.com/entry/2008/oct/20/touch-detection-in-cocos2d-iphone/
After installation of this XCode Template, you can create new project for cocos2d library
A Makefile is also included so that you can build the created new project and ldid fake codeign and install in the /Application folder of iPhone
(1) you need to change the IPHONE_IP in the Makefile
(2) make install_respring
(3) make
(4) make install
If you want to install your Mac public key in iPhone so as to avoid typing password using ssh, please refer to my previous post here
The api documentation of cocos2d are here
http://groups.google.com/group/cocos2d-iphone-discuss
Update : Cocos2d v0.7 XCode Template
curl -O http://apiexplorer.googlecode.com/files/cocos2d_v0.7.zip
unzip cocos2d_v0.7.zip -d "/Developer/Platforms/iPhoneOS.platform/Developer/Library/Xcode/Project Templates"
This new XCode Template v0.7 has been restructured so that when cocos2d is updated in the future, you can just copy the new cocos2d directory and replace the cocos2d-iphone in the old project directory e.g.
cp -r ~/Downloads/cocos2d-iphone-0.8/* ~/Projects/myproject/cocos2d-iphone/
rm -fr ~/Projects/myproject/cocos2d-iphone/cocos2d-iphone.xcodeproj
Monday, December 22, 2008
iPhone SDK 2.2 API Explorer
API Explorer is an iPhone App for searching SDK API, version 1 is written by Patrick Collison
http://collison.ie/blog/2008/10/iphone-hackery-api-explorer
I have enhanced it to version 1.2.1 with addition of searchbox and on-line reference to Erica Sadun 2.2 class documentation
and some bug fixes
Installation Instructions:
Cydia Source : http://cydia.iphone.org.hk/apt/
Section: Utilities
Name: API Explorer
Source code for version 1.2.1 is here
http://www.iphone.org.hk/attach/48276-explorer-1.2.1.zip
SVN repository is here
http://code.google.com/p/apiexplorer/

http://collison.ie/blog/2008/10/iphone-hackery-api-explorer
git clone http://code.collison.ie/git/explorer/.gitI have enhanced it to version 1.2.1 with addition of searchbox and on-line reference to Erica Sadun 2.2 class documentation
and some bug fixes
Installation Instructions:
Cydia Source : http://cydia.iphone.org.hk/apt/
Section: Utilities
Name: API Explorer
Source code for version 1.2.1 is here
http://www.iphone.org.hk/attach/48276-explorer-1.2.1.zip
SVN repository is here
http://code.google.com/p/apiexplorer/
Thursday, November 27, 2008
iPhone SDK 2.2 header files dump is here
http://ericasadun.com/iPhoneDocs220/
MPTVOutWindow video code demo is here
http://www.appleinsider.com/articles/08/11/26/iphone_2_2_hides_video_out_code_for_third_party_apps.html
and the perl script to generate header files
http://arstechnica.com/journals/apple.ars/2008/11/24/dumping-the-iphone-2-2-frameworks
Alternatively you can classdump in iPhone
(1) Install class-dump in Cydia / apt-get
(2) run this script in iPhone to generate the header files in current directory
(3) If you want to remove all header directories under current directory and start over again run
.
.
.
.
.
MPTVOutWindow video code demo is here
http://www.appleinsider.com/articles/08/11/26/iphone_2_2_hides_video_out_code_for_third_party_apps.html
and the perl script to generate header files
http://arstechnica.com/journals/apple.ars/2008/11/24/dumping-the-iphone-2-2-frameworks
Alternatively you can classdump in iPhone
(1) Install class-dump in Cydia / apt-get
apt-get install class-dump(2) run this script in iPhone to generate the header files in current directory
- dump.sh: Select all
#/bin/bash
for FRAMEWORKS in Frameworks PrivateFrameworks; do
 frameworklib=/System/Library/"${FRAMEWORKS}"
 for frameworkpath in "${frameworklib}"/*.framework; do
   frameworkdir="$(basename "${frameworkpath}")"
   frameworkbin="${frameworkdir%.*}"
   if [ -f "${frameworkpath}/${frameworkbin}" ]; then
     echo "Framework: ${frameworkbin}"
     mkdir -p ${frameworkbin}
     class-dump -H -o "${frameworkbin}" "${frameworkpath}/${frameworkbin}"
   fi
 done
done
(3) If you want to remove all header directories under current directory and start over again run
find . -type d -name '[a-zA-Z]*' -print | xargs rm -rf.
.
.
.
.
Sunday, November 23, 2008
How to skip provisioning profile for iPhone SDK 2.2 (build 9M2621)
The trick to skip provisioning profile still works
Just backup and edit the file
/Developer/Platforms/iPhoneOS.platform/Info.plist
and add the magic words in red as below
Please remember to restart your Xcode after the amendment above.
I have tested it to build app on jailbreaked iPhone firmware 2.1 & 2.2
For MobileInstallation patch, please use my package as posted here
http://hackint0sh.org/forum/showpost.php?p=340693&postcount=14
Updated Notes
If you have "security policy error" after Build & Go. Do these steps
(1) Install a new free app from App Store in iPhone (not sync from iTunes)
(2) Launch that newly purchased free app and then close it.
(3) Reboot your iPhone (that is power off and on again)
(4) Launch the app again that you have Build & Go in Xcode to iPhone.
Please also refer to the latest article for SDK2.2.1
http://iphonesdkdev.blogspot.com/2009/01/how-to-skip-provisioning-profile-for.html
Just backup and edit the file
/Developer/Platforms/iPhoneOS.platform/Info.plist
and add the magic words in red as below
<key>NATIVE_ARCH</key>
<string>armv6</string>
<key>PLIST_FILE_OUTPUT_FORMAT</key>
<string>binary</string>
 <key>PROVISIONING_PROFILE_ALLOWED</key>
<string>NO</string>
<key>PROVISIONING_PROFILE_REQUIRED</key>
<string>NO</string>
<key>SDKROOT</key>
<string>iphoneos2.2</string>
Please remember to restart your Xcode after the amendment above.
I have tested it to build app on jailbreaked iPhone firmware 2.1 & 2.2
For MobileInstallation patch, please use my package as posted here
http://hackint0sh.org/forum/showpost.php?p=340693&postcount=14
Updated Notes
If you have "security policy error" after Build & Go. Do these steps
(1) Install a new free app from App Store in iPhone (not sync from iTunes)
(2) Launch that newly purchased free app and then close it.
(3) Reboot your iPhone (that is power off and on again)
(4) Launch the app again that you have Build & Go in Xcode to iPhone.
Please also refer to the latest article for SDK2.2.1
http://iphonesdkdev.blogspot.com/2009/01/how-to-skip-provisioning-profile-for.html
Tuesday, November 4, 2008
Upgrade VMWare Image to Ubuntu 8.10 for iPhone open toolchain SDK2.0 / Android SDK development
(1) Download ubuntu-8-1.10-desktop-i386.iso (32 bit Intel i386 Desktop)
http://www.ubuntu.com/getubuntu/download
MD5 (ubuntu-8-1.10-desktop-i386.iso) = 24ea1163ea6c9f5dae77de8c49ee7c03
Installation is very easy just mount the iso image in the VMWare, and everything goes default. then install VMWare tools. If network does not work try command "sudo dhclient"
(2) VMWare Settings : Harddisk Size 8G, Ram 512MB
(3) Purpose : sdk development on iPhone / Android
Allows samba mount, ssh / scp access
apache2 server with php5 support for sqlite3 db
(4) Add root access for useraccount without password (this does not work, I don't know why, so you still need password)
Ubuntu default root disabled, so you can disable password input by editing etc/sudoers
Add this line (e.g. sdkuser is the default user account)
(5) install build essential packages so that you can compile llvm-gcc for iPhone toolchain SDK2.0
(6) install server packages so that you can have local webserver and ssh and samba server
Install php5-sqlite3
sudo apt-get install php-db php-pear
wget http://us.archive.ubuntu.com/ubuntu/pool/universe/p/php-sqlite3/php-sqlite3_0.5-1_i386.deb
sudo dpkg -i php-sqlite3_0.5-1_i386.deb
(7) Create Project folder for smb mount (guest login ok) so that you can use windows / smb mount the virtual machine folder
(assume sdkuser is the default user account)
and add the followings at the end
Note : you have to restart samba server to make the new configuration effective
(8) install jdk6 so that you can compile Andriod app
(9) Download Android SDK http://dl.google.com/android/android-sdk-linux_x86-1.0_r1.zip from http://code.google.com/android/download_list.html
install in ~/Android/
create sd card & test emulator
(10) Download and Install Eclipse 3.4.1 (you can't use the debian package eclipse which is 3.2 only)
from http://www.eclipse.org/downloads/
http://www.eclipse.org/downloads/download.php?file=/technology/epp/downloads/release/ganymede/SR1/eclipse-java-ganymede-SR1-linux-gtk.tar.gz
install in /usr/lib
Add main menu & icon for eclipse in GNOME
and save this
There is no eclipse icon in the download file eclipse-java-ganymede-SR1-linux-gtk.tar.gz. You can get it from eclipse 3.2.2 package
and install it manually
download the eclipse 3.2.2 package
extract the package and copy the icons to /usr/share/pixmaps/
Install Android sdk plug-in for Eclipse
(based on http://code.google.com/android/intro/installing.html#installingplugin)
add this site and install in Eclipse
http://dl-ssl.google.com/android/eclipse/
Edit Eclipse's preference for Andriod (Window -> Preferences -> Android)
SDK location
emulator options
Test HelloActivity in Eclipse
(a) Create a New Android Project in Eclipse (File -> New -> Project... -> Android -> Android Project)
(b) Choose Create project from existing source and browse to ~/Android/android-sdk-linux_x86-1.0_r1/samples/HelloActivity
(c) Run HelloActivity as Android Application
(d) Then the emulator will start Hello, World! will be on the emulator screen
Note: Please don't set the workspace of Eclipse to the sample project folder
~/Android/android-sdk-linux_x86-1.0_r1/samples/
or else you will get error when importing project from existing source
(11) Install iPhone llvm-gcc and toolchain SDK2.0
Refer to this article and download the file UpgradeToolChain2.tgz and build the llvm-gcc for iPhone
http://iphonesdkdev.blogspot.com/2008/10/how-to-install-llvm-gcc-for-iphone-sdk.html
Install ldid in Linux, so that you can fake codesign it
If you need to codesign the iPhone binary in Linux add this (as one line) to your build script
(12) test apache2 and php so that you can see the php info page in the local webserver
In Firefox browser of Ubuntu enter this address
enable php5 (sometimes you need this)
restart apache server
create this test.php script in /var/www
and see the php info in Firefox browser of Ubuntu
(13) create sqlite3 db
and test sqlite3 & php5-sqlite3 by using testdb.php script to test the access to sqlite3 db on webserver
(14) testdb.php
(15) Enjoy building app
Why to install apache2, php5 and php5-sqlite3 in Ubuntu ?
Because both iPhone and Andriod SDK use sqlite3 as database engine.
Webserver can be served for many purposes when testing including http get/post access and cydia repository as well.

Additional Notes
If you need to install flash plugin in firefox
If you need to install java plugin in firefox
If you need to install xpdf
If you need to install jedit
Install Ubuntu in Virtual PC 2007
The above installation can also be applied for Virtual PC2007 if you use Windows OS. One problem of Ubuntu in VPC 2007 is that "sound does not work"
Install Ubuntu in Virtual PC 2007 may have screen display problem (similar to Fedora) and fail during installation.
Here are the steps to successfully install Ubuntu in Virtual PC 2007.
(1) Setup the new Virtual Machine in VPC 2007 and mount the iso image (ubuntu-8-1.10-desktop-i386.iso).
(2) Inside the Ubuntu Install Screen, first Press "F4" and Select "Safe Graphics mode"
(3) Then press down arrow and highlight the menu "Install Ubuntu". (highlight only and don't press Enter)
(4) Press "F6" to bring up the "Other Options"
Then type "vesa vga=771" at the end of the option line
Then Press "Enter", the installation will start instantly.
Note: If you want other resolution, you can try say vga=791 instead of vga=771
I did not try all these, some of them might not work. The codes are listed out for reference only.
(5) After installation, it will prompt to restart. But the restart might not work and you have to manually reset the VM in VPC 2007
(6) Then release the mounted iso image and in VPC 2007 menu to reset the VM that is in VPC 2007 menu do Action -> Reset
(7) Enjoy using Ubuntu in VPC 2007

(8) To solve the sound problem in VPC2007, start the Terminal in Ubuntu and type
sudoedit /etc/rc.local
At the end of the # lines, but before “exit 0″, type on a new line (again without quotes) “modprobe snd-sb16″
Ctrl + O to write out, enter to accept the name, Ctrl + X to close.
http://www.ubuntu.com/getubuntu/download
MD5 (ubuntu-8-1.10-desktop-i386.iso) = 24ea1163ea6c9f5dae77de8c49ee7c03
Installation is very easy just mount the iso image in the VMWare, and everything goes default. then install VMWare tools. If network does not work try command "sudo dhclient"
(2) VMWare Settings : Harddisk Size 8G, Ram 512MB
(3) Purpose : sdk development on iPhone / Android
Allows samba mount, ssh / scp access
apache2 server with php5 support for sqlite3 db
(4) Add root access for useraccount without password (this does not work, I don't know why, so you still need password)
Ubuntu default root disabled, so you can disable password input by editing etc/sudoers
sudo visudoAdd this line (e.g. sdkuser is the default user account)
sdkuser ALL=(ALL) NOPASSWD:ALL(5) install build essential packages so that you can compile llvm-gcc for iPhone toolchain SDK2.0
sudo apt-get update
sudo apt-get install build-essential bison flex
(6) install server packages so that you can have local webserver and ssh and samba server
sudo apt-get install apache2 php5 libapache2-mod-php5 php5-cli php5-common php5-cgi php5-sqlite openssh-server samba
Install php5-sqlite3
sudo apt-get install php-db php-pear
wget http://us.archive.ubuntu.com/ubuntu/pool/universe/p/php-sqlite3/php-sqlite3_0.5-1_i386.deb
sudo dpkg -i php-sqlite3_0.5-1_i386.deb
(7) Create Project folder for smb mount (guest login ok) so that you can use windows / smb mount the virtual machine folder
(assume sdkuser is the default user account)
mkdir -p /home/sdkuser/Projects
chmod 777 /home/sdkuser/Projects

sudoedit /etc/samba/smb.conf
and add the followings at the end
- smb.conf: Select all
[Projects]
 comment = Projects Folder Share
 writable = yes
 locking = no
 path = /home/sdkuser/Projects
 public = yes
 browseable = yes
 guest ok = yes
 create mask = 0666
 directory mask = 0777
Note : you have to restart samba server to make the new configuration effective
sudo /etc/init.d/samba restart(8) install jdk6 so that you can compile Andriod app
sudo apt-get install sun-java6-jdk
(9) Download Android SDK http://dl.google.com/android/android-sdk-linux_x86-1.0_r1.zip from http://code.google.com/android/download_list.html
install in ~/Android/
mkdir -p ~/Android/
sudo unzip ~/Desktop/android-sdk-linux_x86-1.0_r1.zip -d ~/Android/
sudo chown -R sdkuser:sdkuser ~/Andriod
create sd card & test emulator
~/Android/android-sdk-linux_x86-1.0_r1/tools/mksdcard -l SD500M 500M ~/Android/sd500m.img

~/Android/android-sdk-linux_x86-1.0_r1/tools/emulator -datadir ~/Android -scale 0.7 -sdcard ~/Android/sd500m.img &
(10) Download and Install Eclipse 3.4.1 (you can't use the debian package eclipse which is 3.2 only)
from http://www.eclipse.org/downloads/
http://www.eclipse.org/downloads/download.php?file=/technology/epp/downloads/release/ganymede/SR1/eclipse-java-ganymede-SR1-linux-gtk.tar.gz
install in /usr/lib
cd /usr/lib; sudo tar -xzvf ~/Desktop/eclipse-java-ganymede-SR1-linux-gtk.tar.gz
Add main menu & icon for eclipse in GNOME
sudoedit /usr/share/applications/eclipse.desktop
and save this
- eclipse.desktop: Select all
[Desktop Entry]
Name=Eclipse
Comment=Develop applications in a variety of different programming languages
Exec=/usr/lib/eclipse/eclipse
Icon=eclipse48.png
Terminal=false
Type=Application
Categories=Development;
StartupNotify=true
There is no eclipse icon in the download file eclipse-java-ganymede-SR1-linux-gtk.tar.gz. You can get it from eclipse 3.2.2 package
and install it manually
download the eclipse 3.2.2 package
wget http://us.archive.ubuntu.com/ubuntu/pool/universe/e/eclipse/eclipse_3.2.2-5ubuntu2_i386.debextract the package and copy the icons to /usr/share/pixmaps/
dpkg -x eclipse_3.2.2-5ubuntu2_i386.deb tmp
sudo cp tmp/usr/share/pixmaps/* /usr/share/pixmaps/
rm -fr tmp
Install Android sdk plug-in for Eclipse
(based on http://code.google.com/android/intro/installing.html#installingplugin)
add this site and install in Eclipse
http://dl-ssl.google.com/android/eclipse/
Edit Eclipse's preference for Andriod (Window -> Preferences -> Android)
SDK location
/home/sdkuser/Android/android-sdk-linux_x86-1.0_r1/emulator options
-scale 0.7 -sdcard /home/sdkuser/Android/sd500m.imgTest HelloActivity in Eclipse
(a) Create a New Android Project in Eclipse (File -> New -> Project... -> Android -> Android Project)
(b) Choose Create project from existing source and browse to ~/Android/android-sdk-linux_x86-1.0_r1/samples/HelloActivity
(c) Run HelloActivity as Android Application
(d) Then the emulator will start Hello, World! will be on the emulator screen
Note: Please don't set the workspace of Eclipse to the sample project folder
~/Android/android-sdk-linux_x86-1.0_r1/samples/
or else you will get error when importing project from existing source
(11) Install iPhone llvm-gcc and toolchain SDK2.0
Refer to this article and download the file UpgradeToolChain2.tgz and build the llvm-gcc for iPhone
http://iphonesdkdev.blogspot.com/2008/10/how-to-install-llvm-gcc-for-iphone-sdk.html
Install ldid in Linux, so that you can fake codesign it
cd ~/Projects
wget http://svn.telesphoreo.org/trunk/data/ldid/ldid-1.0.476.tgz
tar -zxf ldid-1.0.476.tgz
cd ldid-1.0.476
g++ -I . -o util/ldid{,.cpp} -x c util/{lookup2,sha1}.c
sudo cp -a util/ldid /usr/bin
If you need to codesign the iPhone binary in Linux add this (as one line) to your build script
export CODESIGN_ALLOCATE=/usr/toolchain2/pre/bin/arm-apple-darwin9-codesign_allocate; ldid -S $(PROJECTNAME)
(12) test apache2 and php so that you can see the php info page in the local webserver
In Firefox browser of Ubuntu enter this address
http://localhost/enable php5 (sometimes you need this)
a2enmod php5restart apache server
sudo /etc/init.d/apache2 restartcreate this test.php script in /var/www
sudo chown -R sdkuser:sdkuser /var/www
echo "<?php phpinfo(); ?>" > /var/www/test.php
and see the php info in Firefox browser of Ubuntu
http://localhost/test.php(13) create sqlite3 db
- sqlite3 test.db: Select all
sudo chown -R sdkuser:sdkuser /var/www
cd /var/www
sqlite3 test.db
sqlite> create table test (id integer primary key, value text);
sqlite> insert into test (value) values('eenie');
sqlite>
sqlite> insert into test (value) values('meenie');
sqlite> insert into test (value) values('miny');
sqlite> insert into test (value) values('mo');
sqlite> select * from test;
sqlite>
sqlite> .exit
and test sqlite3 & php5-sqlite3 by using testdb.php script to test the access to sqlite3 db on webserver
(14) testdb.php
- testdb.php: Select all
<// Version 0.01
<html>
<head><meta http-equiv="Content-Type" content="text-html; charset=UTF-8" /></head>
<title>iPhone Database</title>
<body>
<?php

$ip_dbpath[] = '/var/www/test.db';

//   $ip_dbpath[] = '/var/www/sms.db';
//   $ip_dbpath[] = '/var/www/call_history.db';
//   $ip_dbpath[] = '/var/www/notes.db';
//   $ip_dbpath[] = '/var/www/AddressBook.sqlitedb';
//   $ip_dbpath[] = '/var/www/Calendar.sqlitedb';

// db location in iPhone /private/var/mobile/Library/SMS/sms.db
// db location in iPhone /private/var/mobile/Library/CallHistory/call_history.db
// db location in iPhone /private/var/mobile/Library/Notes/notes.db
// db location in iPhone /private/var/mobile/Library/AddressBook/AddressBook.sqlitedb
// db location in iPhone /private/var/mobile/Library/Calendar/Calendar.sqlitedb


$ip_dbdesc[] = 'test';

//   $ip_dbdesc[] = 'SMS';
//   $ip_dbdesc[] = 'Call History';
//   $ip_dbdesc[] = 'Notes';
//   $ip_dbdesc[] = 'Address Book';
//   $ip_dbdesc[] = 'Calendar';

$ip_query[] = 'SELECT * from test order by 1';
// $ip_query[] = 'SELECT  date, address, text FROM message order by 1 desc, 2;';
// $ip_query[] = 'SELECT  date, address, duration FROM call order by 1 desc;';
// $ip_query[] = 'SELECT  creation_date, data, title FROM Note inner join note_bodies on Note.ROWID = note_bodies.note_id order by 1;';
// $ip_query[] = 'SELECT First, Last, Middle, CreationDate, ModificationDate FROM ABPerson;';
// $ip_query[] = 'SELECT start_date, end_date, summary, location, description FROM Event order by 1, 2;';

// $dbcount = sizeof($ip_dbpath);
// if you uncomment the above db & query and add copy the iPhone db , you can list out the content of sqlitedb of iPhone
$dbcount = 1;

for ($dbnum=0;$dbnum<$dbcount;$dbnum++){

try {
 $dbpath = $ip_dbpath[ $dbnum ];
 $dbh = new PDO('sqlite:'.$dbpath);
 $query = $ip_query[ $dbnum ];
 $stmt = $dbh->prepare($query);
 $stmt->execute();
}
catch (PDOException $e) {
 die("Could not open database" . $e->getMessage());
}
$colcount = $stmt->columnCount();
echo "<h1>". $ip_dbdesc[ $dbnum ] . "</h1>";
echo "<table cellpadding=10 border=1>";

 for ($i=0;$i<$colcount;$i++) {
    $meta = $stmt->getColumnMeta($i);
    echo "<td>".$meta["name"]."</td>";
 }

 while ($row = $stmt->fetch()) {
     echo "<tr>";
     for ($i=0;$i<$colcount;$i++) {
       $meta = $stmt->getColumnMeta($i);
       if ($meta["native_type"] == "null") {
         echo "<td> </td>";
       }
       elseif (preg_match("/date$/i", $meta["name"])) {
         echo "<td>". date("j M Y D g.i a", $row[$i])."</td>";
       }
       elseif (preg_match("/[call|sms]$/i", $meta["name"]) && $meta["name"] == "address" && strlen(rtrim($row[ $i])) == 8) {
        echo "<td><A href='Tel:".$row[$i]."'>".$row[$i]."</A></td>";
       }
       else {
         echo "<td>".$row[ $i]."</td>";
       }
     }
     echo "</tr>";
 }
 echo "</table>";
}
?>
</body>
</html>
(15) Enjoy building app
Why to install apache2, php5 and php5-sqlite3 in Ubuntu ?
Because both iPhone and Andriod SDK use sqlite3 as database engine.
Webserver can be served for many purposes when testing including http get/post access and cydia repository as well.

Additional Notes
If you need to install flash plugin in firefox
sudo apt-get install flashplugin-nonfreeIf you need to install java plugin in firefox
sudo apt-get install sun-java6-pluginIf you need to install xpdf
sudo apt-get install xpdf-readerIf you need to install jedit
sudo apt-get install jeditInstall Ubuntu in Virtual PC 2007
The above installation can also be applied for Virtual PC2007 if you use Windows OS. One problem of Ubuntu in VPC 2007 is that "sound does not work"
Install Ubuntu in Virtual PC 2007 may have screen display problem (similar to Fedora) and fail during installation.
Here are the steps to successfully install Ubuntu in Virtual PC 2007.
(1) Setup the new Virtual Machine in VPC 2007 and mount the iso image (ubuntu-8-1.10-desktop-i386.iso).
(2) Inside the Ubuntu Install Screen, first Press "F4" and Select "Safe Graphics mode"
(3) Then press down arrow and highlight the menu "Install Ubuntu". (highlight only and don't press Enter)
(4) Press "F6" to bring up the "Other Options"
Then type "vesa vga=771" at the end of the option line
Then Press "Enter", the installation will start instantly.
Note: If you want other resolution, you can try say vga=791 instead of vga=771
I did not try all these, some of them might not work. The codes are listed out for reference only.
vga=769 means 600x480 8 bits color
vga=785 means 600x480 16 bits color
vga=786 means 600x480 24 bits color
vga=771 means 800x600 8 bits color
vga=788 means 800x600 16 bits color
vga=789 means 800x600 24 bits color
vga=773 means 1024x768 8 bits color
vga=791 means 1024x768 16 bits color
vga=792 means 1024x768 24 bits color
(5) After installation, it will prompt to restart. But the restart might not work and you have to manually reset the VM in VPC 2007
(6) Then release the mounted iso image and in VPC 2007 menu to reset the VM that is in VPC 2007 menu do Action -> Reset
(7) Enjoy using Ubuntu in VPC 2007

(8) To solve the sound problem in VPC2007, start the Terminal in Ubuntu and type
sudoedit /etc/rc.local
At the end of the # lines, but before “exit 0″, type on a new line (again without quotes) “modprobe snd-sb16″
Ctrl + O to write out, enter to accept the name, Ctrl + X to close.
Subscribe to:
Posts (Atom)