

Friday, December 9, 2022
Tuesday, August 23, 2022

Tuesday, April 19, 2022
How to use M1 Max / M1 Ultra machine to crack password using brute force
M1 Max and M1 Ultra has lots of GPU power for cracking password. For brute force attach we can use hashcat and John the Ripper.
(1) Installation
(1.1) Install XCode and Command Line Utilities from Apple
(1.2) Install Homebrew
(1.3) Install John the Ripper and add path by using Terminal command
(1.4) Install rar and. unrar for testing (as the HomeBrew version might not working.
(1.5)Install hashcat from git
(2) Testing
% rar2john test.rar
test.rar:$rar5$16$852481e911dc38c66cec2fbe8e9a825b$15$e1c319e802eec30efab80c6bd7470468$8$f9c3bfde638768a5
And copy the hash value in blue color and it will be used again in hashcat
Use hashcat to brute force attack
If finished, the password will be in testrar.out.txt $rar5$16$852481e911dc38c66cec2fbe8e9a825b$15$e1c319e802eec30efab80c6bd7470468$8$f9c3bfde638768a5:1234
Testing of zip file with password
Testing of pdf file with password
Testing of office file with password
If you don't have the machine for cracking purpose, you can do this using cloud GPU for a fee.
(1) Installation
(1.1) Install XCode and Command Line Utilities from Apple
(1.2) Install Homebrew
(1.3) Install John the Ripper and add path by using Terminal command
brew install john-jumbo
export PATH=/opt/homebrew/Cellar/john-jumbo/1.9.0/share/john/:$PATH
(1.4) Install rar and. unrar for testing (as the HomeBrew version might not working.
cd $(HOME)/Downloads
wget https://www.rarlab.com/rar/rarmacos-arm-611.tar.gz
sudo cp rar/rar /usr/local/bin
sudo cp rar/unrar /usr/local/bin
(1.5)Install hashcat from git
cd $(HOME)/Downloads
git clone https://github.com/hashcat/hashcat.git
cd hashcat
make
(2) Testing
# create a test.rar file with password of 1234 for testing
cd $(HOME)/Downloads
mkdir -p testhashcat
cd testhascat
echo 'I am testing' > test.txt
rar a -P1234 test.rar test.txt
Use John the Ripper to generate hash% rar2john test.rar
test.rar:$rar5$16$852481e911dc38c66cec2fbe8e9a825b$15$e1c319e802eec30efab80c6bd7470468$8$f9c3bfde638768a5
And copy the hash value in blue color and it will be used again in hashcat
Use hashcat to brute force attack
../hashcat/hashcat -m 13000 -w 3 -a 3 \
'$rar5$16$852481e911dc38c66cec2fbe8e9a825b$15$e1c319e802eec30efab80c6bd7470468$8$f9c3bfde638768a5' \
--increment --increment-min 2 --increment-max 8 '?d?d?d?d?d?d?d?d' --potfile-path=rarfile.pot  -o testrar.out.txt
Explanation of the parameters used in hashcat
-m 13000 means --hash-type RAR5 see here https://hashcat.net/wiki/doku.php?id=example_hashes
-a 3 means attack-mode Brute-force
-w 3 Workload Profiles High
--increment --increment-min 2 --increment-max 8
means increment the guess password with minimum of 2 and maximum of 8

?d means digit as below
Built-in charsets are
?l = abcdefghijklmnopqrstuvwxyz
?u = ABCDEFGHIJKLMNOPQRSTUVWXYZ
?d = 0123456789
?h = 0123456789abcdef
?H = 0123456789ABCDEF
?s = «space»!"#$%&'()*+,-./:;<=>?@[\]^_`{|}~
?a = ?l?u?d?s
If finished, the password will be in testrar.out.txt $rar5$16$852481e911dc38c66cec2fbe8e9a825b$15$e1c319e802eec30efab80c6bd7470468$8$f9c3bfde638768a5:1234
Testing of zip file with password
zip -e test.zip test.txt
zip2john test.zip
% zip2john test.zip
ver 1.0 efh 5455 efh 7875 test.zip/test.txt PKZIP Encr: 2b chk, TS_chk, cmplen=25, decmplen=13, crc=A491CD37
test.zip/test.txt:$pkzip2$1*2*2*0*19*d*a491cd37*0*42*0*19*a491*796a*55a56112ff0d2913127e2502764b2f8044e7975a5a23014084*$/pkzip2$:test.txt:test.zip::test.zip
../hashcat/hashcat -m 17210 -w 3 -a 3 \
'$pkzip2$1*2*2*0*19*d*a491cd37*0*42*0*19*a491*796a*55a56112ff0d2913127e2502764b2f8044e7975a5a23014084*$/pkzip2$' \
--increment --increment-min 2 --increment-max 8 '?d?d?d?d?d?d?d?d' --potfile-path=zipfile.pot -o testzip.out.txt

% cat testzip.out.txt
$pkzip2$1*2*2*0*19*d*a491cd37*0*42*0*19*a491*796a*55a56112ff0d2913127e2502764b2f8044e7975a5a23014084*$/pkzip2$:1256
Testing of pdf file with password
% perl pdf2john.pl testpdf.pdf
testpdf.pdf:$pdf$4*4*128*-4*1*16*9d60ea4e1b8444818557a392476b3ab3*32*13f7b5e82e85872782a2795121fc850d00000000000000000000000000000000*32*7f8b9892322afb0dccd7a4259da14c65e9d5009abb26bae6d1708fed9dc60edc

../hashcat/hashcat -m 10500 -w 3 -a 3 \
'$pdf$4*4*128*-4*1*16*9d60ea4e1b8444818557a392476b3ab3*32*13f7b5e82e85872782a2795121fc850d00000000000000000000000000000000*32*7f8b9892322afb0dccd7a4259da14c65e9d5009abb26bae6d1708fed9dc60edc' \
--increment --increment-min 2 --increment-max 8 '?d?d?d?d?d?d?d?d' --potfile-path=pdffile.pot -o testpdf.out.txt
note: hash-type for pdf
10400	PDF 1.1 - 1.3 (Acrobat 2 - 4)
10410	PDF 1.1 - 1.3 (Acrobat 2 - 4), collider #1
10420	PDF 1.1 - 1.3 (Acrobat 2 - 4), collider #2
10500	PDF 1.4 - 1.6 (Acrobat 5 - 8)
10600	PDF 1.7 Level 3 (Acrobat 9)
10700	PDF 1.7 Level 8 (Acrobat 10 - 11)
Testing of office file with password
% python office2john.py test.docx
test.docx:$office$*2013*100000*256*16*561f4dcaaac333e7c06d150f9ea5aea2*ef4e7b026217124561ecb865b324eac4*e9ef4a859f2c81581db0e27d9ce48e6451b82cd1641941e8adc10dc5600969cb

../hashcat/hashcat -m 9600 -w 3 -a 3 \
'$office$*2013*100000*256*16*561f4dcaaac333e7c06d150f9ea5aea2*ef4e7b026217124561ecb865b324eac4*e9ef4a859f2c81581db0e27d9ce48e6451b82cd1641941e8adc10dc5600969cb' \
--increment --increment-min 2 --increment-max 8 '?h?h?h?h?h?h?h?h' --potfile-path=officefile.pot -o testdocx.out.txt
note: hash-type for office doc
9400	MS Office 2007
9500	MS Office 2010
9600	MS Office 2013
If you don't have the machine for cracking purpose, you can do this using cloud GPU for a fee.
Sunday, April 17, 2022
How to install Ubuntu on Intel Macbook Air/Pro with T2 Security Chip
Currently you cannot easily install Linux onto an Apple computer which uses the T2 security chip because the Linux Kernel with the T2 support is not included in any of the currently released distributions as a default kernel. And cannot use the built-in keyboard, trackpad, bluetooth and neither WiFi nor ethernet.
(1) There is a patched Ubuntu ISO for Macbook Air/Pro (2018-2020) with T2 Security Chip hardware here. https://github.com/marcosfad/mbp-ubuntu/releases
(2) This ISO image requires you to install on the internal SSD and if you are on the lastest macOS Monterey, the internal SSD would be encrypted. It is not recommended to dual booting Macbook with both macOS and Linux unless you have good backups and are prepared to perform a clean install or restore from backup since you will at some point most likely do something which will prevent either OS from booting and possibly risk losing access to all the data in one or both operating systems.
(3) So it is probably better to use USB to boot up for testing out Linux on Macbook first.
You can download this installed ISO images here (2.64GB) and burn it to an USB stick with 128GB using balenaEtcher for Mac. You don't need to unzip the downloaded zip file as balenaEtcher can read zip file and write to the USB stick directly. The image has an extra 10GB exFAT partition, so that data can be exchanged offline with PC or Mac.
(4) The Macbook should be Disable Secure Boot and Set allowed boot media based on the instructions here https://support.apple.com/HT208330
(5) Then plug in the USB and restart the Macbook and press option key while bootup, then select EFI boot to startup Ubuntu. The installed version of this Ubuntu image, username and password are all ubuntu
(6) This patched Ubuntu ISO should worked for the butterfly keyboard, function keys, touch pad, bluetooth, display and audio. But the microphone might not be working. If the wifi is not working initially, the fix is here using the Terminal (control-option-T) commands
Fix wifi issue of ubuntu-mbp image
Then
Ubuntu Short Cut Key on Mac
Move window to left or right
command + arrow (e.g. left or right)
Switch desktop
control + option + arrow (e.g. up or down)
Move current window to desktop command + shift + page up / page down
command + shift + fn + arrow (e.g. up or down)
Show all desktops
command
Change window
command + tab
Further Installation of Waydroid and sideload of Android apk on Ubuntu
Color correction of WayDroid
Go to Settings App -> Accessibility -> Color inversion (on)
If you want to install Ubuntu Mate Desktop, the terminal command is
(1) There is a patched Ubuntu ISO for Macbook Air/Pro (2018-2020) with T2 Security Chip hardware here. https://github.com/marcosfad/mbp-ubuntu/releases
(2) This ISO image requires you to install on the internal SSD and if you are on the lastest macOS Monterey, the internal SSD would be encrypted. It is not recommended to dual booting Macbook with both macOS and Linux unless you have good backups and are prepared to perform a clean install or restore from backup since you will at some point most likely do something which will prevent either OS from booting and possibly risk losing access to all the data in one or both operating systems.
(3) So it is probably better to use USB to boot up for testing out Linux on Macbook first.
You can download this installed ISO images here (2.64GB) and burn it to an USB stick with 128GB using balenaEtcher for Mac. You don't need to unzip the downloaded zip file as balenaEtcher can read zip file and write to the USB stick directly. The image has an extra 10GB exFAT partition, so that data can be exchanged offline with PC or Mac.
(4) The Macbook should be Disable Secure Boot and Set allowed boot media based on the instructions here https://support.apple.com/HT208330
(5) Then plug in the USB and restart the Macbook and press option key while bootup, then select EFI boot to startup Ubuntu. The installed version of this Ubuntu image, username and password are all ubuntu
(6) This patched Ubuntu ISO should worked for the butterfly keyboard, function keys, touch pad, bluetooth, display and audio. But the microphone might not be working. If the wifi is not working initially, the fix is here using the Terminal (control-option-T) commands
Fix wifi issue of ubuntu-mbp image
sudo dpkg -i /usr/src/iso-firmware.deb
#edit /etc/NetworkManager/NetworkManager.conf as below
sudo editor /etc/NetworkManager/NetworkManager.conf
- NetworkManager.conf Select all
[main]
plugins=ifupdown,keyfile

[ifupdown]
managed=false

[device]
wifi.scan-rand-mac-address=no
#edit /etc/NetworkManager/conf.d/wifi_backend.conf and add # sign to stop iwd as below
sudo editor /etc/NetworkManager/conf.d/wifi_backend.conf
- wifi_backend.conf Select all
#[device]
#wifi.backend=iwd
Then
# restart NetworkManager
sudo systemctl restart NetworkManager
sudo modprobe brcmfmac
Then reboot Ubuntu...
Ubuntu Short Cut Key on Mac
Move window to left or right
command + arrow (e.g. left or right)
Switch desktop
control + option + arrow (e.g. up or down)
Move current window to desktop command + shift + page up / page down
command + shift + fn + arrow (e.g. up or down)
Show all desktops
command
Change window
command + tab
Further Installation of Waydroid and sideload of Android apk on Ubuntu
- shell script Select all
sudo apt update
sudo apt install python3-pip lxc curl wget -y
sudo pip install pyclip

export DISTRO="focal" && sudo curl https://repo.waydro.id/waydroid.gpg --output /usr/share/keyrings/waydroid.gpg && echo "deb [signed-by=/usr/share/keyrings/waydroid.gpg] https://repo.waydro.id/ $DISTRO main" > ~/waydroid.list && sudo mv ~/waydroid.list /etc/apt/sources.list.d/waydroid.list

sudo apt update
sudo apt install dkms -y

# if old Linux Kernel get this https://github.com/anbox/anbox-modules
# With Linux Kernel 5.17 (that is >=5.7), download and build Linux modules from here https://github.com/choff/anbox-modules
wget https://github.com/choff/anbox-modules/archive/refs/heads/master.zip
unzip master.zip
cd anbox-modules-master/
sudo ./INSTALL.sh

# check Linux kernel modules installed anbox-ashmem & anbox-binder
dkms status

# install waydroid
sudo apt install waydroid -y
#sudo editor /etc/resolv.conf as
nameserver 8.8.8.8
nameserver 8.8.4.4
#sudo editor /etc/gbinder.d/anbox.conf as
[Protocol]
/dev/binder = aidl2
/dev/vndbinder = aidl2
/dev/hwbinder = hidl

[ServiceManager]
/dev/binder = aidl2
/dev/vndbinder = aidl2
/dev/hwbinder = hidl
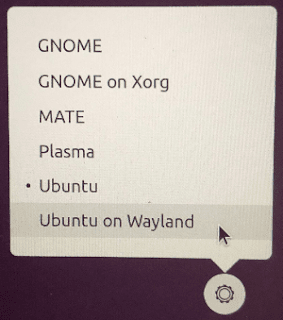
Logout Ubuntu (PC keyboard: control-alt-delete / Mac keyboard: control-option-fn-delete)
And login again with "Ubuntu on Wayland" (setting at the bottom right hand corner)

# Download waydroid image (752.66 MB) then init
sudo waydroid init
sudo systemctl start waydroid-container
waydroid session start

# sideload apk (x86_64 apk only)
waydroid app install myapplication.apk
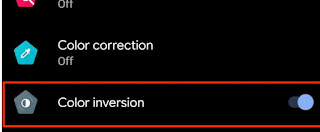
Color correction of WayDroid
Go to Settings App -> Accessibility -> Color inversion (on)

If you want to install Ubuntu Mate Desktop, the terminal command is
sudo apt-get update
sudo apt-get install ubuntu-mate-desktop
Saturday, April 9, 2022
How to erase Mac SSD for downgrade macOS to older version
It used to be using created bootable USB stick in order to downgrade macOS to older version, as in here.
But with the new macOS Monterey and with the T2 Security Chip of modem Mac, your Macintosh SSD will be encrypted and for Intel Mac, the bootcamp partition will also encrypted.
As a result, you cannot install macOS from USB stick to the encrptyed SSD, even if you have enabled boot from media in the Startup Security Utility.
The downgrade path will now require you to erase all content and settings first.
If you haven't do so, you have to do Erase Mac as below before installing any macOS version.
In addition, if you want to downgrade macOS, you have to do
Step (1) Backup all your important data and be sure you have a good Internet connection for the remaining steps
Step (2) Erase Mac, reboot Mac and select Erase Mac from the menu. This will wipe and remove all the whole Macintosh SSD, including the encrypted Macintosh partition and bootcamp partition if any, you might need to authenticate by entering the admin password of your existing MacOS to do this. You can use Internet Recovery to the original macOS version (Option-Shift-Command-R), or else it will default to the latest macOS Monterey (Option-Command-R).
Step (3) Activate Mac, reboot Mac and enter Recovery by pressing Command-R and activate the Mac.
Step (4) Internet Recovery, reboot Mac and enter Recovery by pressing Command-R and use Internet Recovery to choose install original version of macOS.
Step (5) Enable boot from media, After successful installation of the old macOS version, create bootable USB stick of your required macOS version based on this guide from Apple. Reboot Mac and enable boot from media from in the Startup Security Utility.
Step (5) Install macOS from USB stick, reboot again and press Option to choose the USB stick to install from macOS.
Thursday, June 10, 2021
How to download WWDC2021 videos and subtitles
The scripts for previous WWDC are here
https://iphonesdkdev.blogspot.com/2020/10/how-to-download-wwdc2020-videos-and.html
https://iphonesdkdev.blogspot.com/2017/07/how-to-fetch-wwdc-2017-video-subtitle.html
Create and Run this script wwdc2021_fetch_srt.sh to fetch WWDC2021 subtitle
Run this shell script to format as SRT subtitle
Run this script wwdc2021_fetch_mp4.sh to download all mp4 (HD and SD) videos (also works for 2021)
Run this script to rename the video or subtitles to proper title (HD & SD) videos
# Example nohup commnad for Linux Download
nohup bash -c 'cd $HOME/Downloads/WWDC/; ./wwdc2021_fetch_mp4.sh' &> nohup.wwdc2021.mp4.out &
nohup bash -c 'cd $HOME/Downloads/WWDC/; ./wwdc2021_fetch_en.srt.sh' &> nohup.wwdc2021.en.srt.out &
# or use screen utility to download
screen -S wwdcdownloadmp4
bash wwdc2021_fetch_mp4.sh
https://iphonesdkdev.blogspot.com/2017/07/how-to-fetch-wwdc-2017-video-subtitle.html
Create and Run this script wwdc2021_fetch_srt.sh to fetch WWDC2021 subtitle
- wwdc2021_fetch_en.srt.sh Select all
#!/bin/bash
# @Last Modified by:   javacom
# @Last Modified time: 2021-06-10

WWDC_YEAR=2021;
#
WWDC_SESSION_PREFIX=https://developer.apple.com/videos/play/wwdc$WWDC_YEAR;
WWDC_LOCAL_DIR=$(basename $WWDC_SESSION_PREFIX);

detect_video_m3u8 () {
 local session_url=$WWDC_SESSION_PREFIX/$SESSION_ID/;
 local session_html=$(curl -s $session_url);
 local video_url=$(echo "$session_html" | grep .m3u8 | grep $SESSION_ID | head -n1 | sed "s#.*\"\(https://.*m3u8\)\".*#\1#");
 echo "$session_html" | grep .mp4 | grep $SESSION_ID | sed "s#.*\"\(https://.*mp4\).*\".*#\1#" | while read mp4_url; do
  local mp4_filename=$(basename $mp4_url | cut -d. -f1);
  local srt_filename=$mp4_filename.en.srt;
#  local srt_filename=$mp4_filename.zh.srt;
  echo "> Subtitle local: $WWDC_LOCAL_DIR/$srt_filename" >&2;
  > $WWDC_LOCAL_DIR/$srt_filename;
 done
 echo "$video_url";
 echo "> Video: $video_url" >&2;
}

detect_subtitle_m3u8 () {
 local video_url=$1;
# en subtitle
 local subtitle_uri=$(curl -s $video_url | grep "LANGUAGE=\"eng\"" | grep "TYPE=SUBTITLES" | sed "s#.*URI=\"\(.*\)\"#\1#" | sed "s#.FORCED=NO##");

# zh subtitle
 #local subtitle_uri=$(curl -s $video_url | grep "LANGUAGE=\"zh\"" | sed "s#.*URI=\"\(.*\)\"#\1#");
 local subtitle_url=$subtitle_uri;
 [[ "$subtitle_uri" != http* ]] && {
  subtitle_url=$(dirname $video_url)/$subtitle_uri;
 }
 echo "$subtitle_url";
 echo "> Subtitle: $subtitle_url" >&2;
}

download_subtitle_contents () {
 local subtitle_url=$1;
 echo "> Downloading... "

 local subtitle_base_url=$(dirname $subtitle_url);
 curl -s $subtitle_url | grep "webvtt" | while read webvtt; do
  local subtitle_webvtt=$subtitle_base_url/$webvtt;
  #echo "- get $subtitle_webvtt";
  local subtitle_content=$(curl -s $subtitle_webvtt);
# en subtitle
  ls $WWDC_LOCAL_DIR/"wwdc$WWDC_YEAR"-"$SESSION_ID"*.en.srt | while read srt_file; do
# zh subtitle
#  ls $WWDC_LOCAL_DIR/"wwdc$WWDC_YEAR"-"$SESSION_ID"*.zh.srt | while read srt_file; do
   echo "$subtitle_content" >> $srt_file;
  done
 done
}

main () {
 [ ! -d $WWDC_LOCAL_DIR ] && {
  mkdir $WWDC_LOCAL_DIR;
 }

#Year 2020/2021 change {3\} to {3,5\}
 curl -s $WWDC_SESSION_PREFIX | grep /videos/play/wwdc$WWDC_YEAR | sed "s#.*/videos/play/wwdc$WWDC_YEAR/\([0-9]\{3,5\}\).*#\1#" | sort | uniq | while read SESSION_ID; do
  #echo "SESSION_ID is" $SESSION_ID
  local video_url=$(detect_video_m3u8 $SESSION_ID);
  local subtitle_url=$(detect_subtitle_m3u8 $video_url);

  download_subtitle_contents $subtitle_url;
 done
}

main;
Run this shell script to format as SRT subtitle
- shellscript.sh Select all
WWDC_YEAR=2021;
#
cd wwdc$WWDC_YEAR
mkdir -p sd
mkdir -p hd
for i in *_sd.??.srt; do sed -e '/WEBVTT/d;/X-TIMESTAMP/d;s/align.middle line.*$//;' $i | awk '/^[0-9]{2}:[0-9]{2}:/ {seen[$0]++; skipduplicated=0} {if (seen[$0]>1) skipduplicated=1; if (!skipduplicated) print $0}' | awk -v RS="" '{gsub("\n", "-Z"); print}' | awk '$0 !~/^WEB/ {print $0}' | uniq | awk '{printf "\n%s-Z%s", NR,$0 }' | awk -v ORS="\n\n" '{gsub("-Z", "\n"); print}' | sed -e 's/.A:middle$//g;s/>/>/g;s/</</g;1,2d;' > sd/$i; done
for i in *_hd.??.srt; do sed -e '/WEBVTT/d;/X-TIMESTAMP/d;s/align.middle line.*$//;' $i | awk '/^[0-9]{2}:[0-9]{2}:/ {seen[$0]++; skipduplicated=0} {if (seen[$0]>1) skipduplicated=1; if (!skipduplicated) print $0}' | awk -v RS="" '{gsub("\n", "-Z"); print}' | awk '$0 !~/^WEB/ {print $0}' | uniq | awk '{printf "\n%s-Z%s", NR,$0 }' | awk -v ORS="\n\n" '{gsub("-Z", "\n"); print}' | sed -e 's/.A:middle$//g;s/>/>/g;s/</</g;1,2d;' > hd/$i; done
Run this script wwdc2021_fetch_mp4.sh to download all mp4 (HD and SD) videos (also works for 2021)
- wwdc2021_fetch_mp4.sh Select all
#!/bin/bash
# @Last Modified by:   javacom
# @Last Modified time: 2021-06-10

WWDC_YEAR=2021;
#
WWDC_SESSION_PREFIX=https://developer.apple.com/videos/play/wwdc$WWDC_YEAR;
WWDC_LOCAL_DIR=$(basename $WWDC_SESSION_PREFIX);

download_mp4_video () {
 local session_url=$WWDC_SESSION_PREFIX/$SESSION_ID/;
 local session_html=$(curl -s $session_url);
 local video_url=$(echo "$session_html" | grep .m3u8 | grep $SESSION_ID | head -n1 | sed "s#.*\"\(https://.*m3u8\)\".*#\1#");
 echo "$session_html" | grep .mp4 | grep $SESSION_ID | sed "s#.*\"\(https://.*mp4\).*\".*#\1#" | while read mp4_url; do
  local mp4_filename=$(basename $mp4_url);
  if [ -e $WWDC_LOCAL_DIR/$mp4_filename ]
  then
      echo "> MP4 already existed : $WWDC_LOCAL_DIR/$mp4_filename" >&2;
      echo "> To resume broken download use curl -C - --connect-timeout 1200 -o $WWDC_LOCAL_DIR/$mp4_filename $mp4_url" >&2;
      echo " " >&2;
  else
      echo "> MP4 Downloading... : $mp4_url" >&2;
      curl  --connect-timeout 120 -o $WWDC_LOCAL_DIR/$mp4_filename $mp4_url
  fi
 done
}

main () {
 [ ! -d $WWDC_LOCAL_DIR ] && {
  mkdir $WWDC_LOCAL_DIR;
 }

#Year 2020/2021 change {3\} to {3,5\}
 curl -s $WWDC_SESSION_PREFIX | grep /videos/play/wwdc$WWDC_YEAR | sed "s#.*/videos/play/wwdc$WWDC_YEAR/\([0-9]\{3,5\}\).*#\1#" | sort | uniq | while read SESSION_ID; do
  download_mp4_video $SESSION_ID;
 done
}

main;
Run this script to rename the video or subtitles to proper title (HD & SD) videos
- wwdc2021_rename_title.sh Select all
#!/bin/sh
# @Last Modified by:   javacom
# @Last Modified time: 2021-6-10


# For WWDC2021 video files, VIDEO=sd or VIDEO=hd
WWDC_YEAR=2021; VIDEO=sd; curl -s https://developer.apple.com/videos/wwdc${WWDC_YEAR}/ | grep -B1 "video-title"  | sed -e "s#[[:space:]]\{10,\}<a href=./videos/play/wwdc202./\([0-9]\{3,5\}\).*#\[ -f  \"wwdc${WWDC_YEAR}-\1_${VIDEO}.mp4\" \] \&\& mv \"wwdc${WWDC_YEAR}-\1_${VIDEO}.mp4\" \"wwdc${WWDC_YEAR}-\1_${VIDEO}_#" -e "s/[\@:’\'\,?]//g" -e "s/\"\(The.*\)\"/\1/" -e 's#.*video-title..\(.*\)\(</h4>\)#\1.mp4"#' -e '/--/d' | sed '/^\[ -f/{N;s/\n//;}' | sed  "s#[\/@:’\'\,]#_#g" | /bin/bash

# For WWDC2021 English subtitle files, VIDEO=sd or VIDEO=hd
WWDC_YEAR=2021; VIDEO=sd; curl -s https://developer.apple.com/videos/wwdc${WWDC_YEAR}/ | grep -B1 "video-title"  | sed -e "s#[[:space:]]\{10,\}<a href=./videos/play/wwdc202./\([0-9]\{3,5\}\).*#\[ -f  \"wwdc${WWDC_YEAR}-\1_${VIDEO}.en.srt\" \] \&\& mv \"wwdc${WWDC_YEAR}-\1_${VIDEO}.en.srt\" \"wwdc${WWDC_YEAR}-\1_${VIDEO}_#" -e "s/[\@:’\'\,?]//g" -e "s/\"\(The.*\)\"/\1/" -e 's#.*video-title..\(.*\)\(</h4>\)#\1.en.srt"#' -e '/--/d' | sed '/^\[ -f/{N;s/\n//;}' | sed  "s#[\/@:’\'\,]#_#g" | /bin/bash
# Example nohup commnad for Linux Download
nohup bash -c 'cd $HOME/Downloads/WWDC/; ./wwdc2021_fetch_mp4.sh' &> nohup.wwdc2021.mp4.out &
nohup bash -c 'cd $HOME/Downloads/WWDC/; ./wwdc2021_fetch_en.srt.sh' &> nohup.wwdc2021.en.srt.out &
# or use screen utility to download
screen -S wwdcdownloadmp4
bash wwdc2021_fetch_mp4.sh
Thursday, April 8, 2021
How to write subrountine call in macOS assembly code for x86_64 and arm64
(1) Demo the subrountine call in macOS assembly code for x86_64 and arm64. For M1 Mac with Rosetta 2 installed, it can compile and run x86_64 and arm64 binary after installation of Xcode
(2) To compile with -g and codesign the program so as to debug in lldb under macOS.
(3) To debug using lldb
- callfactorial.c Select all
/*
* An application that illustrates calling the factorial function defined elsewhere.
*/

#include <stdio.h>
#include <inttypes.h>

uint64_t factorial(unsigned n);

int main() {
    for (unsigned i = 0; i < 20; i++) {
        printf("factorial(%2u) = %llu\n", i, factorial(i));
    }
}
- factorial.s Select all
# ----------------------------------------------------------------------
# A 64-bit recursive implementation of the function
#
#     uint64_t factorial(unsigned n)
#
# implemented recursively with x86_64 and arm64 assembly code
# -----------------------------------------------------------------------

        .globl  _factorial

        .text
#ifdef __arm64__
        .align 4
#endif

_factorial:
#ifdef __x86_64__
        cmp     $1, %rdi            # n <= 1?
        jnbe    L1                  # if not, go do a recursive call
        mov     $1, %rax            # otherwise return 1
        ret
#endif
#ifdef __arm64__
        cmp     x8, #1              //# n > 1?
        b.gt    L1                  //# if yes, go do a recursive call
        mov     x0, #1              //# otherwise return 1
        ret
#endif
L1:
#ifdef __x86_64__
        push    %rdi                # save n on stack (also aligns %rsp!)
        dec     %rdi                # n-1
        call    _factorial          # factorial(n-1), result goes in %rax
        pop     %rdi                # restore n
        imul    %rdi, %rax          # n * factorial(n-1), stored in %rax
        ret
#endif
#ifdef __arm64__
        STP     X8, LR, [SP, #-16]! //# push x8 and LR(x30)
                                    //  LR is to return from subroutine
        subs    x8, x8, #1          //# n-1
        bl      _factorial          //# factorial(n-1), result goes in x0
        LDP     X8, LR, [SP], #16   //# pop x8 and LR(x30)
        mul     x0, x0, x8          //# n * factorial(n-1), stored in x0
        ret
#endif
(2) To compile with -g and codesign the program so as to debug in lldb under macOS.
- shell script Select all
# To compile and codesign x86_64 version
clang factorial.s callfactorial.c -g -o callfactorial_arm64 -arch x86_64 && codesign --entitlement entitlements --force -s - callfactorial_x86_64
# To compile and codesign arm64 version
clang factorial.s callfactorial.c -g -o callfactorial_arm64 -arch arm64 && codesign --entitlement entitlements --force -s - callfactorial_arm64
(3) To debug using lldb
- shell script Select all
lldb callfactorial_x86_64
# or
lldb callfactorial_arm64

# lldb debug session for arm64 - useful commands
(lldb) breakpoint set --name main --name factorial
(lldb) breakpoint list
(lldb) run
(lldb) step
(lldb) po i
(lldb) reg read x0 x8 lr pc
(lldb) reg read -f t cpsr
# lldb debug session for x86_64 - useful commands
(lldb) reg read -f d rax rdi rflags
(lldb) reg read -f t rflags
# print the address value in the stackpointer for x86_64
(lldb) p *(int **)$sp
# hint: to search lldb command history use ctrl-r
Subscribe to:
Posts (Atom)