Step 1: A 12GB Flash Drive (at least!) and formated with Mac OS Extended (Journaled) and Choose GUID Partition Map as the Scheme.
The name of the USB Flash Drive will be named as Untitled as default
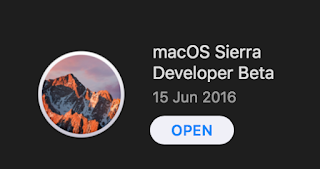
Step 2: Go to Mac App Store and from the past purchase history, see if there is any Sierra Developer Beta in purchase history and then download it. For unknown reasons, the previous versions of macOS cannot be downloaded in the Mac App Store of Mojave.
There is one more rule : "A Mac can boot NO version OLDER than the version it shipped with". So choose the newer version.

Install_macOS_Sierra_Developer_Beta.rar (4.40GB)
https://mega.nz/#!yk4lSSRQ!WoOSpLf5BSlRR4if3RrbHVHQptG0Tfmw0Bnx4BCrHlA
Install_macOS_High_Sierra.rar (4.86GB)
https://mega.nz/#!WopVXYqQ!LlfKompmLDag20CE6UrsYQmL6e9mKoEgW08bLAvcnbs
Install_macOS_Mojave_Beta.rar (5.22GB)
https://mega.nz/#!qtwxkS7T!7_lG6VhwQLL1Zyc_-s_T5jjVu06vnnvHJTsSTa7fNiI
Step 3: Go to Terminal and type command
- shellscript Select all
# for Sierra Developer beta the command is
sudo /Applications/Install\ macOS\ Sierra\ Developer\ Beta.app/Contents/Resources/createinstallmedia  --volume /Volumes/Untitled --applicationpath /Applications/Install\ macOS\ Sierra\ Developer\ Beta.app

# for High Sierra the command is
sudo /Applications/Install\ macOS\ High\ Sierra.app/Contents/Resources/createinstallmedia --volume /Volumes/Untitled --applicationpath /Applications/Install\ macOS\ High\ Sierra.app

# for Mojave beta the command is
sudo /Applications/Install\ macOS\ Mojave\ Beta.app/Contents/Resources/createinstallmedia --volume /Volumes/Untitled --nointeraction --downloadassets
Step 4: Use the bootable macOS installer USB in a mac and press Option key when boot and use terminal to repair disk or filesystem. The reason to use High Sierra or above is that it can mount the new Apple File System (APFS).

No comments:
Post a Comment