Saturday, July 7, 2018

How to make a bootable macOS installer on USB in macOS Mojave

To create a bootable installer of the macOS on USB drive is useful to repair filesystem when another mac is not bootable.

Step 1: A 12GB Flash Drive (at least!) and formated with Mac OS Extended (Journaled) and Choose GUID Partition Map as the Scheme.
The name of the USB Flash Drive will be named as Untitled as default

Step 2: Go to Mac App Store and from the past purchase history, see if there is any Sierra Developer Beta in purchase history and then download it. For unknown reasons, the previous versions of macOS cannot be downloaded in the Mac App Store of Mojave.
There is one more rule : "A Mac can boot NO version OLDER than the version it shipped with". So choose the newer version.
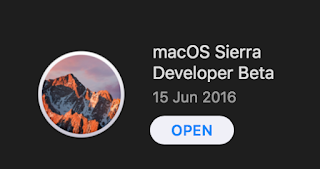

Install_macOS_Sierra_Developer_Beta.rar (4.40GB)
https://mega.nz/#!yk4lSSRQ!WoOSpLf5BSlRR4if3RrbHVHQptG0Tfmw0Bnx4BCrHlA
Install_macOS_High_Sierra.rar (4.86GB)
https://mega.nz/#!WopVXYqQ!LlfKompmLDag20CE6UrsYQmL6e9mKoEgW08bLAvcnbs
Install_macOS_Mojave_Beta.rar (5.22GB)
https://mega.nz/#!qtwxkS7T!7_lG6VhwQLL1Zyc_-s_T5jjVu06vnnvHJTsSTa7fNiI

Step 3: Go to Terminal and type command
shellscript    Select all
# for Sierra Developer beta the command is sudo /Applications/Install\ macOS\ Sierra\ Developer\ Beta.app/Contents/Resources/createinstallmedia --volume /Volumes/Untitled --applicationpath /Applications/Install\ macOS\ Sierra\ Developer\ Beta.app # for High Sierra the command is sudo /Applications/Install\ macOS\ High\ Sierra.app/Contents/Resources/createinstallmedia --volume /Volumes/Untitled --applicationpath /Applications/Install\ macOS\ High\ Sierra.app # for Mojave beta the command is sudo /Applications/Install\ macOS\ Mojave\ Beta.app/Contents/Resources/createinstallmedia --volume /Volumes/Untitled --nointeraction --downloadassets


Step 4: Use the bootable macOS installer USB in a mac and press Option key when boot and use terminal to repair disk or filesystem. The reason to use High Sierra or above is that it can mount the new Apple File System (APFS).

Friday, June 29, 2018

How to install CocoaPods for macOS 10.14 beta


shell script    Select all
# update gem sudo gem update --system # Operation not permitted error # yes do it twice sudo gem update --system # install cocoapods sudo gem install -n /usr/local/bin cocoapods # install dependencies for project cd ~/MyProject pod install # if re-clone CocoaPods repo spec cd ~/.cocoapods/repos/ rm -fr master/ git clone --depth 1 https://github.com/CocoaPods/Specs.git master


Sunday, June 17, 2018

How to install turicreate on macOS 10.14 beta

Install turicreate on macOS 10.14 beta 1
shell script    Select all
# upgrade pip # curl https://bootstrap.pypa.io/get-pip.py | sudo python curl https://bootstrap.pypa.io/get-pip.py | python # install packages sudo pip install requests==2.18.4 turicreate==5.0b1


(1) Test turicreate example - Image Classifier
shell script    Select all
mkdir -p $HOME/MLClassifier cd $HOME/MLClassifier # download dataset and cleanup curl -L -o dataset.zip https://drive.google.com/uc?id=1ZLigrn7YcETalcj2qK6UqXceDdOV3244&export=download unzip dataset.zip rm -fr __MACOSX; rm dataset/.DS_Store dataset/*/.DS_Store # create python script cat > classifier.py << 'EOF' import turicreate as turi # load images from dataset folder url = "dataset/" data = turi.image_analysis.load_images(url) # define image categories data["foodType"] = data["path"].apply(lambda path: "Rice" if "rice" in path else "Soup") # create sframe data.save("rice_or_soup.sframe") # preview dataset data.explore() # load sframe dataBuffer = turi.SFrame("rice_or_soup.sframe") # create training data using 90% of dataset trainingBuffers, testingBuffers = dataBuffer.random_split(0.9) # create model model = turi.image_classifier.create(trainingBuffers, target="foodType", model="squeezenet_v1.1", max_iterations=100) # Alternate model use ResNet-50 # model = turi.image_classifier.create(trainingBuffers, target="foodType", model="resnet-50") # evaluate model evaluations = model.evaluate(testingBuffers) print evaluations["accuracy"] # save model model.save("rice_or_soup.model") model.export_coreml("RiceSoupClassifier.mlmodel") EOF #run script python classifier.py


(2) Test turicreate example - Logistic Regression
shell script    Select all
mkdir -p $HOME/LGClassifier cd $HOME/LGClassifier # create python script cat > classifier.py << 'EOF' import turicreate as turi data = turi.SFrame('http://static.turi.com/datasets/regression/yelp-data.csv') data['is_good'] = data['stars'] >= 3 # create sframe data.save("yelp.sframe") # preview dataset #data.show() # load sframe dataBuffer = turi.SFrame("yelp.sframe") # create training data using 80% of dataset train_data, test_data = dataBuffer.random_split(0.8) # create model model=turi.logistic_classifier.create(train_data, target='is_good', features = ['user_avg_stars', 'business_avg_stars', 'user_review_count', 'business_review_count', 'city', 'categories_dict'], max_iterations=200) print model # save predictions predictions = model.classify(test_data) print predictions # evaluate model evaluations = model.evaluate(test_data) print "Accuracy : %s" % evaluations["accuracy"] print "Confusion Matrix : \n%s" % evaluations["confusion_matrix"] EOF #run script python classifier.py


(3) Some data manipulation tips when preparing training data
shell script    Select all
# remove the quotes (replace the number with the quotes with the number without them) in csv file, typically "save as CSV" from excel file. # for example, "222,267.87","455,365.44",... convert to 222267.87,455365.44,... #In shell script cat exceldata.csv | perl -p -e 's/,(?=[\d,.]*\d")//g and s/"(\d[\d,.]*)"/\1/g' > dataset.csv # use map, lambda and zip functions when convert and compute numeric data from 2 data columns #In python script import math data['rate'] = map(lambda (x,y): 0 if x is None or y is None else (0 if math.isnan(x) or math.isnan(y) or math.isinf(y) or x==0 else (999999 if math.isinf(x) or y==0 else 999999 if x/y > 999999 else x/y)) , zip(data['OS'], data['Total Amount'])) # replace training data when values are inf(infinity) or nan(Not A Number) in 'amount' column #In python script import math train_data['amount'] = train_data['amount'].apply(lambda x: 0 if math.isnan(x) else x) train_data['amount'] = train_data['amount'].apply(lambda x: 999 if math.isinf(x) else x) # or use nested if else #In python script import math train_data['amount'] = train_data['amount'].apply(lambda x: 0 if math.isnan(x) else (999 if math.isinf(x) else x )) print train_data['amount'].summary() # remove rows in training data with inf(infinity) or nan(Not A Number) values in 'amount' column #In python script import math train_data = train_data[train_data['amount'].apply(lambda x: 0 if math.isinf(x) or math.isnan(x) else 1)] # SFrame methods but beware, some of the methods are not working https://apple.github.io/turicreate/docs/api/generated/turicreate.SFrame.html # Other SFrame data manipulation examples https://github.com/apple/turicreate/blob/master/userguide/sframe/data-manipulation.md


(4) Some data examination tips
shell script    Select all
# summary print train_data['amount'].summary() # crosstab import pandas as pd pd.crosstab(data["Rating"], data["is_bad"], margins=True) # custom frequency count for 'amount' column import pandas as pd pd.crosstab(train_data['amount'].apply(lambda x: " 0-10" if x <=10 else ("10-20" if x <=20 else ("20-30" if x <=30 else ("30-40" if x <=30 else ("40-50" if x <=50 else ">50"))))), "Count")


Saturday, June 9, 2018

Playground examples for XCode 10 Beta 1

Playground Support for iOS12 and Swift 4.2
iOS.playground    Select all
import UIKit import PlaygroundSupport //: **Markup** //: ### Define UIView class MyView : UIView { @objc public func changeTitle(_ sender:UIButton!) { sender.setTitle("Welcome to WWDC2018", for: []) } } let myView = MyView(frame: CGRect(x:0, y:0, width:500, height:500)) var button = UIButton(type: .system) button.frame = CGRect(x:100, y:100, width:300, height:200) button.setTitle("Hi Press me!", for: []) button.tintColor = .blue button.setTitleColor(.orange, for: []) button.addTarget(myView, action: #selector(MyView.changeTitle(_:)), for: .touchUpInside) myView.addSubview(button) PlaygroundPage.current.liveView = myView


Playground Icon Drawings in iOS and Swift 4.2
macOS.playground    Select all
import UIKit //: Define IconView class IconView: UIView { override func draw(_ rect: CGRect) { drawRawBackgroundWithBaseColor(strokeColor: UIColor.orange, backgroundRectangle: self.bounds) let textAttributes: [NSAttributedString.Key : Any] = [ NSAttributedString.Key.foregroundColor: UIColor.red, NSAttributedString.Key.font: UIFont.systemFont(ofSize: 32.0)] let FString: String = "Hello World" let distanceX: CGFloat = -12.0 let distanceY: CGFloat = 0.0 let centerX = self.bounds.midX let centerY = self.bounds.midY FString.draw(at: CGPoint(x:centerX+distanceX, y:centerY+distanceY), withAttributes: textAttributes) } } func drawRawBackgroundWithBaseColor(strokeColor: UIColor, backgroundRectangle:CGRect) { let lineWidth = backgroundRectangle.width/36.0 let cornerRadius = backgroundRectangle.width/16.0 let tileRectangle = backgroundRectangle.insetBy(dx: lineWidth/2.0, dy: lineWidth/2.0) // Stroke Drawing let strokePath = UIBezierPath(roundedRect:tileRectangle, cornerRadius:cornerRadius) strokeColor.setStroke() strokePath.lineWidth = lineWidth strokePath.stroke() // Draw an ellipse let ovalPath = UIBezierPath(ovalIn: backgroundRectangle.insetBy(dx: lineWidth*1.5, dy: lineWidth*1.5)) UIColor.blue.setStroke() ovalPath.lineWidth = lineWidth ovalPath.stroke() let context:CGContext = UIGraphicsGetCurrentContext()! context.setFillColor(UIColor.green.cgColor) context.addRect(CGRect(x: 100.0, y: 100.0, width: 60.0, height: 60.0)) context.fillPath() } //: Instantiate the UIView let rect = CGRect(x: 0.0, y: 0.0, width: 420.0, height: 320.0) let icon = IconView(frame: rect) icon.backgroundColor = UIColor.clear


CreateML for macOS 10.14 Beta 1 (requires macOS 10.14 Mojave)
macOS.playground    Select all
import Cocoa import CreateML //: Specify Data /* Input as CSV mycsv.csv: beds,baths,squareFt, price 2,2,2000,400000 4,3,2500,500000 3,2,1800,450000 3,2,1500,300000 let houseData = try MLDataTable(contentsOf: URL(fileURLWithPath: "mycsv.csv")) */ //: Input as dictionary let mydata : [String: MLDataValueConvertible] = [ "beds": [2,4,3,3], "baths": [2,3,2,2], "squareFt": [2000,2500,1800,1500], "price": [400000,500000,450000,300000] ] let houseData = try MLDataTable(dictionary:mydata) let (trainingData, testData) = houseData.randomSplit(by: 0.8, seed: 0) //: Create Model let pricer = try MLRegressor(trainingData: houseData, targetColumn: "price") //: Evaluate Model let evalator = pricer.evaluation(on: testData) print(pricer) //: Save Model try pricer.write(to:URL(fileURLWithPath: "HousePricer.mlmodel"))